
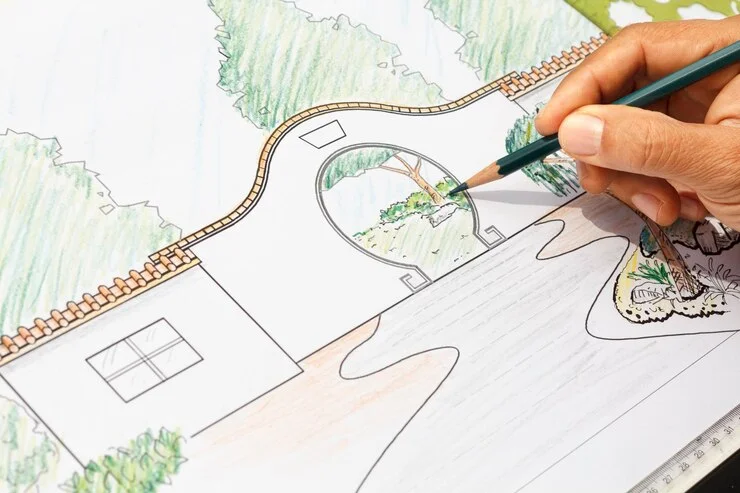
Drawing Techniques for Beginners Tips
Have you always dreamed of being able to draw, but felt intimidated by the prospect of picking up a pencil and putting it to paper? Learning to draw can seem daunting, but with the right techniques and practice, anyone can develop this rewarding skill. In this comprehensive guide, we’ll explore fundamental drawing techniques that will help transform you from an absolute beginner to a confident artist.
Drawing is not just a form of creative expression; it’s also a valuable way to enhance observation skills, improve hand-eye coordination, and cultivate patience and attention to detail. Whether you aspire to become a professional artist, or simply want to pick up a relaxing and fulfilling hobby, mastering these essential drawing techniques will provide a solid foundation.
So, let’s dive in and unlock the joy of drawing, one stroke at a time!
Getting Started with the Basics
Before we delve into specific techniques, it’s important to have the right supplies and set up your drawing space properly. Here’s what you’ll need:

Essential Drawing Supplies:
- A drawing pad or sketchbook
- A set of pencils (ranging from 2H to 6B)
- A pencil sharpener or knife
- An eraser (kneaded erasers are great for lifting pencil marks)
- A ruler or other straightedge
Setting Up Your Drawing Space
Find a comfortable spot with good lighting, either natural light from a window or a bright lamp. Adjust your chair or stool to the right height so that you can draw with your arm resting on the table, reducing fatigue.
Proper Pencil Grip:
- Hold the pencil about an inch from the tip, using your thumb, index, and middle fingers.
- Keep your grip gentle but firm, avoiding a tight squeeze.
- Your pencil should form about a 45-degree angle with the paper.
By starting with the right setup and pencil grip, you’ll be able to draw with better control and comfort, setting yourself up for success.
Understanding Line Quality
Lines are the building blocks of any drawing, and mastering different line types and weights is crucial for rendering realistic forms and textures.
Types of Lines:
- Contour Lines: These lines define the outer edges of an object, separating it from the background.
- Construction Lines: Used as guides to help map out proportions and perspective, these are typically light and sketchy.
- Gesture Lines: Fluid, continuous lines that capture the essence of a subject’s movement or form.
- Outline: The final, decisive lines that define the finished drawing.
Varying Line Weight and Texture
The weight and texture of your lines can greatly impact the depth and form of your drawings.
Line Weight: Increase pressure for darker, thicker lines that create a sense of solidity and depth. Use lighter lines for sketchy details or construction lines.
Textured Lines: Experiment with different pencil grades (H for harder, B for softer) to create varied line textures. Harder pencils create crisp, defined lines, while softer pencils produce thicker, smudgier lines.
By understanding and practicing different line types and weights, you’ll be able to breathe life into your drawings and convey a wide range of forms and textures.
Observational Drawing Techniques
One of the most important skills for any artist is learning to observe and accurately render what you see. Here are some foundational observational drawing techniques:
Contour Line Drawing
Contour line drawing involves slowly tracing the outermost edges of a subject with your pencil, never lifting your pencil from the paper. This exercise trains your hand and eye to work together, improving hand-eye coordination and observation skills.
Negative Space Drawing
Instead of focusing on the subject itself, negative space drawing involves rendering the spaces around and between objects. This unique perspective can help you see forms more accurately and avoid common drawing pitfalls like distorted proportions.
Seeing Shapes, Forms, and Values
Effective drawing requires breaking down what you see into basic shapes, forms, and values (lights and darks). By simplifying complex subjects into these fundamental elements, you’ll be able to render them more realistically.
Example Exercise: Draw a simple still life by first identifying the basic shapes and forms, then mapping out the light and dark values you observe.
Mastering these observational techniques will not only improve your drawing skills but also enhance your overall perception and ability to translate the three-dimensional world onto a two-dimensional surface.
Shading and Value
Creating a sense of depth, form, and realism in your drawings relies heavily on proper shading and an understanding of value.
Shading Basics with Pencils
Shading involves applying varying degrees of pencil pressure to create a range of values from light to dark. Here are some essential shading techniques:
- Hatching: Parallel lines drawn in the same direction.
- Cross-hatching: Intersecting sets of parallel lines.
- Blending: Using a blending stump or tortillon to smooth out pencil marks.
Tip: Start with light, broad strokes and gradually build up darker values. It’s easier to darken an area than to lighten it.
Creating Form and Depth with Value
The placement and gradation of values are what give your drawings a sense of form and depth.
Core Shadow: The area of an object receiving no direct light, creating the darkest value.
Cast Shadow: The dark shape projected onto a surface by an object blocking the light source.
Highlights: The brightest spots on a surface where the light source is directly reflected.
By carefully observing and rendering these areas of light and shadow, you’ll be able to make your drawings appear three-dimensional and realistic.
Example: Render a simple sphere using a range of values to illustrate the form, core shadow, cast shadow, and highlights.
Mastering shading and value will elevate your drawings from flat and lifeless to dynamic and compelling.
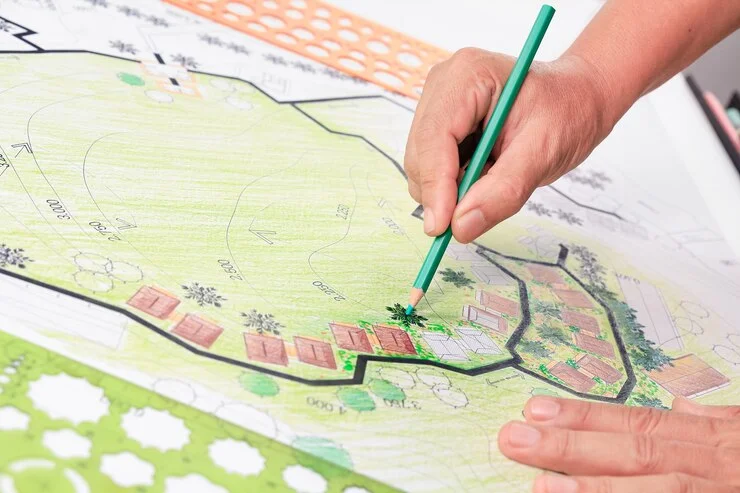
Perspective Drawing for Beginners
Understanding and applying principles of perspective is essential for creating accurate and realistic drawings of objects, landscapes, and environments.
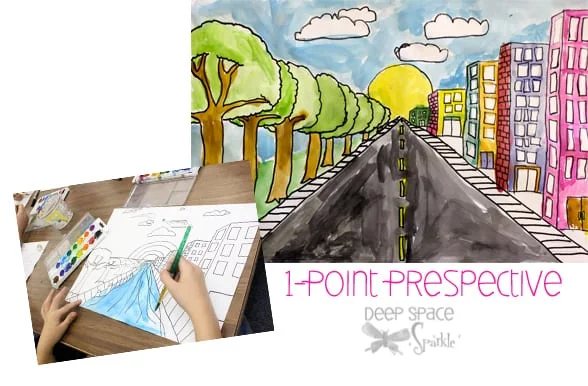
One-Point Perspective Basics
One-point perspective is used when the viewer is looking straight at a flat surface or an object from the front or back. All parallel lines recede to a single vanishing point on the horizon line.
Steps:
- Establish the horizon line and vanishing point.
- Draw a series of parallel lines converging at the vanishing point.
- Add perpendicular lines to create the illusion of depth and space.
Two-Point Perspective
Two-point perspective is used when the viewer is looking at a corner or edge of an object or environment. Parallel lines recede to two separate vanishing points on the horizon line.
Steps:
- Establish the horizon line and two vanishing points.
- Draw a series of parallel lines converging at each vanishing point.
- Add perpendicular lines to create the illusion of depth and space.
Tip: Practice drawing simple shapes and objects like cubes, cylinders, and buildings to solidify your understanding of perspective principles.
By grasping these fundamental perspective concepts, you’ll be able to accurately depict depth, space, and scale in your drawings, making them appear more realistic and three-dimensional.
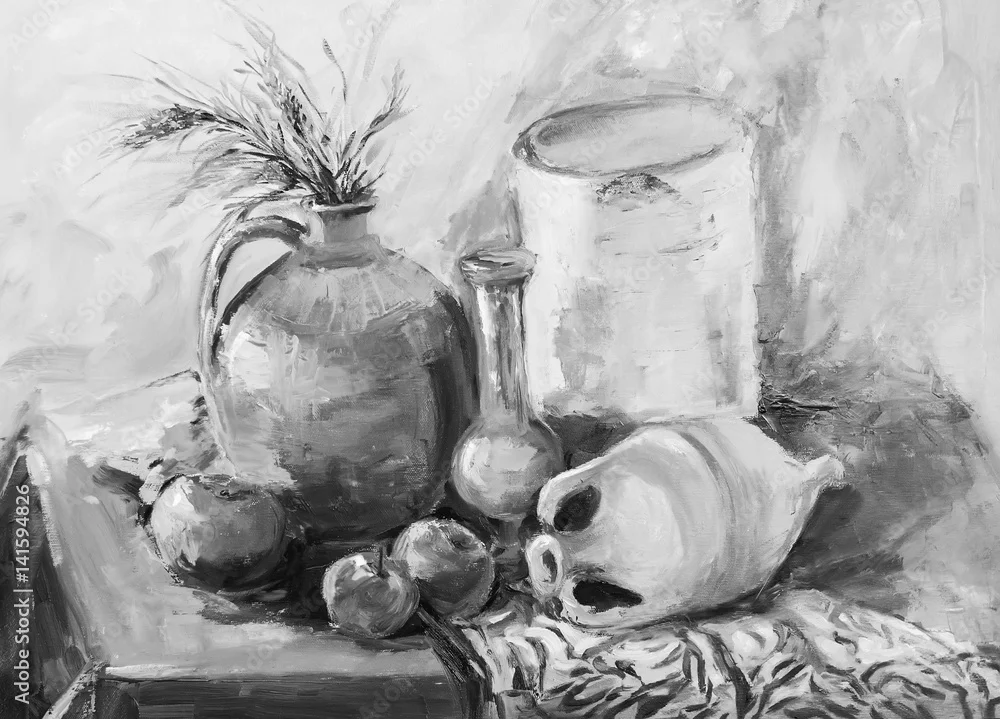
Drawing Still Life and Texture
Still life drawings are an excellent way to practice rendering form, value, and texture. Here’s how to approach this skill:
Setting Up a Simple Still Life
Start with a simple arrangement of 2-3 objects with varying shapes, textures, and surfaces (e.g., a piece of fruit, a glass or ceramic object, and a fabric or paper item).
Place the objects on a tabletop or surface near a window or lamp for good lighting. Arrange the objects in an interesting composition, considering the negative space between them.
Rendering Different Textures
Textures add depth, interest, and realism to your drawings. Pay close attention to the unique characteristics of each surface:
- Smooth: Shiny or glossy surfaces (like glass or metal) have highlights and reflections.
- Rough: Textured surfaces (like wood or bark) require varied, broken lines and values.
- Fuzzy: Soft textures (like fabric or fruit) require careful observation of the direction and flow of fibers or hair.
Example Exercise: Draw a simple still life arrangement, focusing on accurately depicting the different textures using shading, line quality, and attention to detail.
Using Highlights and Cast Shadows
Highlights and shadows are key for creating a sense of form and depth in your still life drawings.
Highlights: Identify and carefully render the brightest spots where the light source is directly reflected on each object’s surface.
Cast Shadows: Observe the dark shapes created by each object blocking the light source, and include these cast shadows in your drawing.
By mastering the rendering of textures, highlights, and shadows, your still life drawings will come to life with a realistic, three-dimensional quality.
Figure Drawing for Beginners
Drawing the human figure is both challenging and rewarding. While it may seem intimidating at first, breaking it down into simple shapes and following a few key techniques can help beginners achieve impressive results.
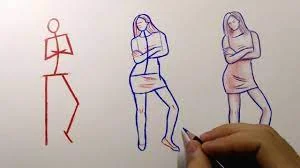
Basics of Figure Drawing Proportions
Understanding the basic proportions of the human figure is crucial for accurate figure drawings. A common approach is to use the “head” as a unit of measurement:
- An average adult figure is approximately 7-8 heads tall.
- The shoulders are about 2 heads wide.
- The hips are slightly less than 2 heads wide.
Tip: Practice drawing simple stick figures or gesture drawings to get a feel for these basic proportions before moving on to more detailed studies.
Gesture Drawing Warm-Up Exercises
Gesture drawing involves quickly capturing the essence of a figure’s pose and movement using fluid, continuous lines.
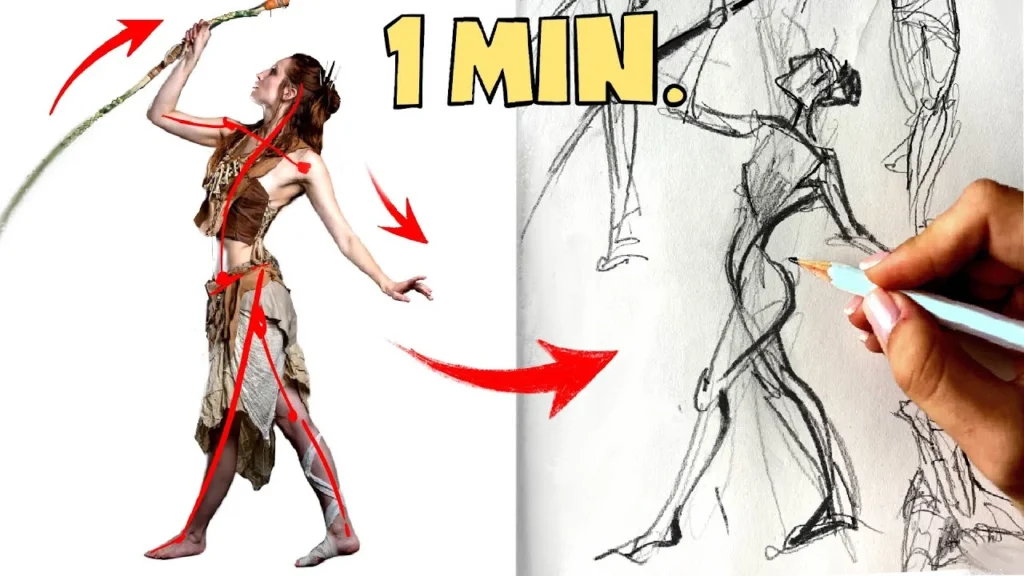
Steps:
- Set a short time limit (e.g., 30 seconds to 2 minutes).
- Observe the overall gesture and flow of the figure’s pose.
- Use loose, continuous lines to quickly sketch the figure’s general shape and movement.
Regular gesture drawing practice will improve your ability to capture the human form accurately and expressively.
Tips for Drawing Human Features
While mastering the entire human figure takes time and practice, focusing on individual features can help build your skills:
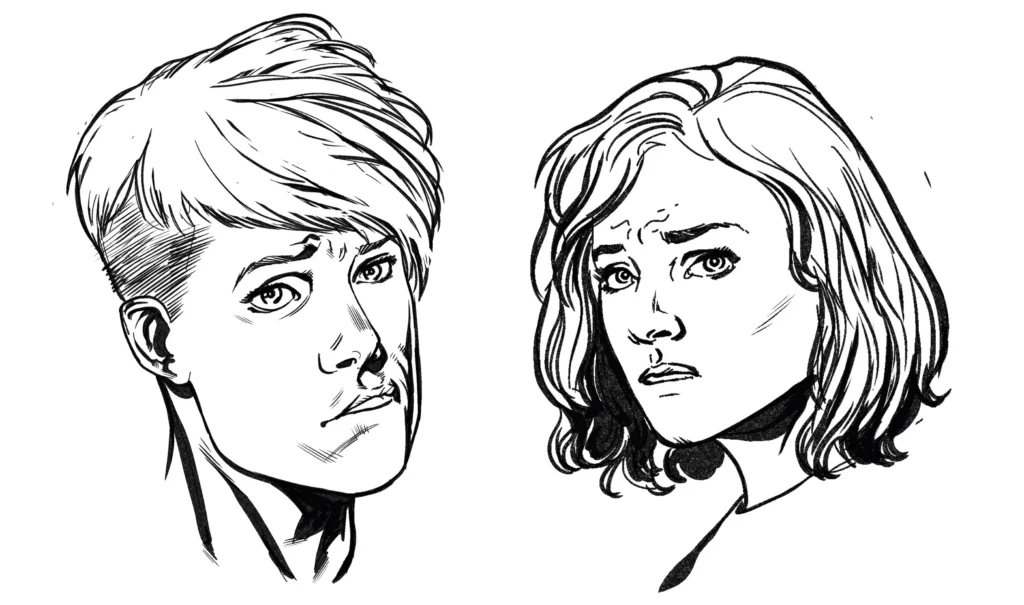
Eyes: Observe the shape, proportions, and placement of the eyes, lids, lashes, and brow ridges.
Nose and Lips: Study the unique curves, angles, and proportions that make up these facial features.
Hands: Though challenging, hands are excellent practice for observing form, proportion, and detail.
Example Exercise: Set up a mirror and practice drawing your own facial features or hands, focusing on accurate proportions and capturing the unique characteristics.
With patience and dedicated practice, your figure drawings will gradually improve in realism and expressiveness.
Taking Your Drawings to the Next Level
Once you’ve developed a solid foundation in these essential drawing techniques, it’s time to explore ways to take your skills to new heights.
Compositional Tips for More Dynamic Drawings
Thoughtful composition can elevate a drawing from ordinary to extraordinary:
- Rule of Thirds: Place key elements along intersecting lines that divide the frame into thirds, horizontally and vertically.
- Leading Lines: Use converging lines to draw the viewer’s eye into and through the composition.
- Framing: Use natural frames (like doorways or branches) to direct focus onto your subject.
Experimenting with Other Drawing Media
While pencil is a versatile and approachable medium, exploring others can add variety and depth to your drawings:
- Charcoal: Thick, bold strokes produce deep blacks and dramatic shadows.
- Colored Pencils: Layer and blend colors for rich, vibrant drawings.
- Pastels: Soft, chalky pigments create a velvety, painterly effect.
Tip: Try combining different media in a single drawing for unique textural effects.
Drawing from Imagination and Developing Your Style
As you gain experience and confidence, challenge yourself to draw from your imagination rather than direct observation. Combine familiar forms and elements in new, creative ways to develop your own artistic style.
Potential Exercises:
- Design your own character or fantastical creature.
- Illustrate a scene from a favorite book or myth.
- Create an imaginary landscape or environment.
Regularly drawing from your imagination will strengthen your visualization skills and allow your unique creative voice to shine through.
People Also Ask
Q: What are the best drawing pencils for beginners?
For starting out, invest in a set that includes a range from hard pencils (like 2H or 4H) for precise lines, to soft pencils (like 2B or 4B) for shading. A general set of 6-12 pencils is a great star
Q: How do I get better at shading?
Dedicated practice is key. Try shading simple forms like spheres or cubes while paying close attention to the gradients of value. Master techniques like hatching, cross-hatching, and blending.
Q: How do you draw realistic eyes?
Observe closely and break the eye down into its basic shapes and values: the curved eyelid shapes, the spherical eyeball, the dark iris and pupil, highlighted areas, and precise eyelash details.
Q: What are some good drawing exercises for beginners?
Contour line drawings, gesture drawings, value spheres and cubes, still life studies, figure drawing from references, and perspective exercises with basic shapes.
Q: How long does it take to get good at drawing?
Like any skill, drawing takes dedicated practice over time. Consistency is key. With regular practice in drawing techniques, you’ll begin to see noticeable improvement within a few months. But drawing is a lifelong journey – even masters continually hone their skills.
The most important things are to have fun with the process, be patient with yourself, and draw regularly from observation as well as imagination. With time and persistence, you’ll be amazed by your progress!
