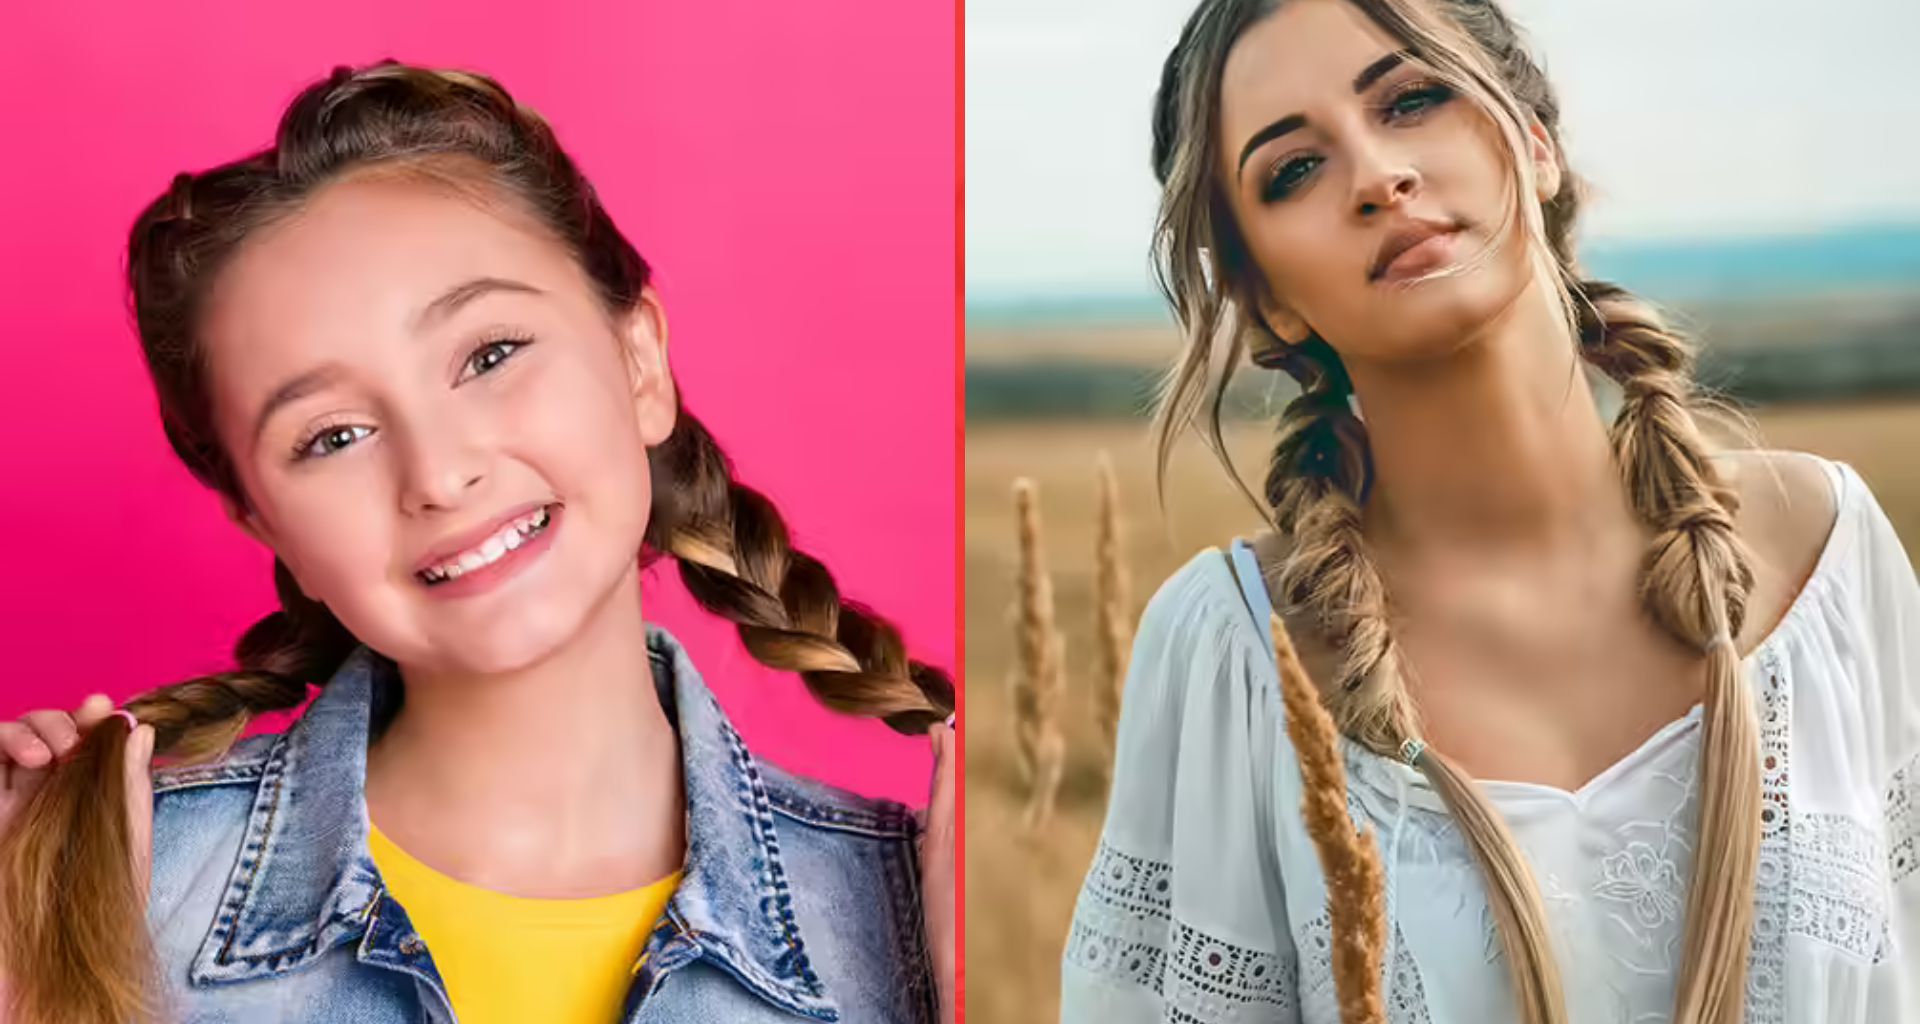
There’s something magical about styling your little girl’s hair. Whether it’s the joy in her eyes as she admires her braided reflection or the sweet moments spent brushing out tangles while sharing stories, these experiences are priceless. Braids aren’t just a hairstyle—they’re an expression of creativity, personality, and love. From playful bubble braids to elegant French waterfall styles, we’ve curated 41 stunning braids that will make your angel feel like royalty. Let’s dive into this world of whimsy and charm!
Why Braids Are Timeless
Braids have been around for centuries, dating back to 3500 BC in ancient Egypt. They were more than just a practical way to keep hair neat—they were a social activity, a symbol of culture, and even a marker of identity. Today, braids continue to captivate us with their versatility and beauty. For little girls, they’re not only functional but also fun and fashionable. Ready to explore? Here’s our list of the cutest braids for kids, complete with step-by-step instructions.
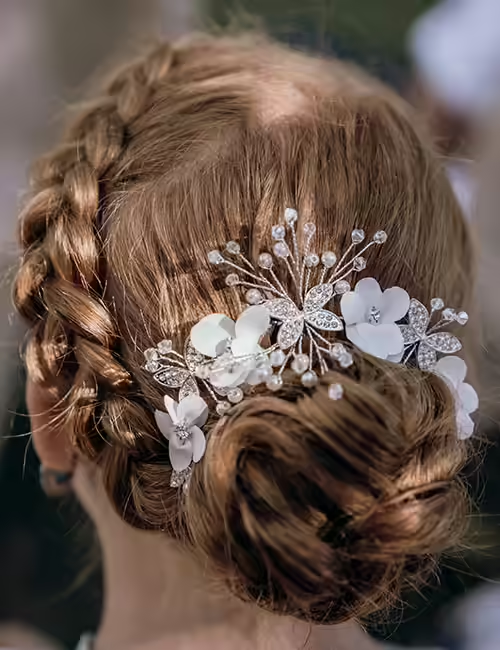
1. French Waterfall Braid: A Touch of Elegance
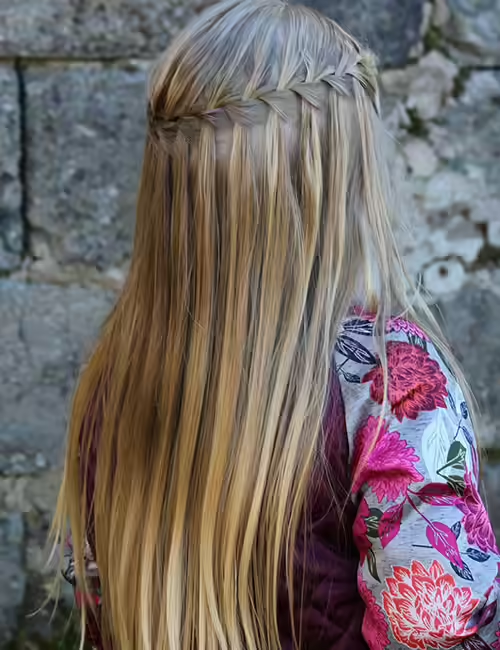
This ethereal braid is perfect for special occasions like weddings, birthdays, or family gatherings. It adds a princess-like charm to long hair, making your little one feel truly magical.
What You’ll Need:
- Hair elastic
- Hairbrush
How to Style:
- Brush out any tangles and create a deep side part.
- On the thicker side, separate three small sections near the front.
- Begin braiding by crossing the right strand over the middle, then the left over the middle.
- As you progress, drop the bottom strand and pick up a new section from above. Repeat until you reach the back of the head.
- Secure the braid with an elastic and use bobby pins to tuck stray strands neatly.
Pro Tip: Add sparkly accessories for extra glamour.
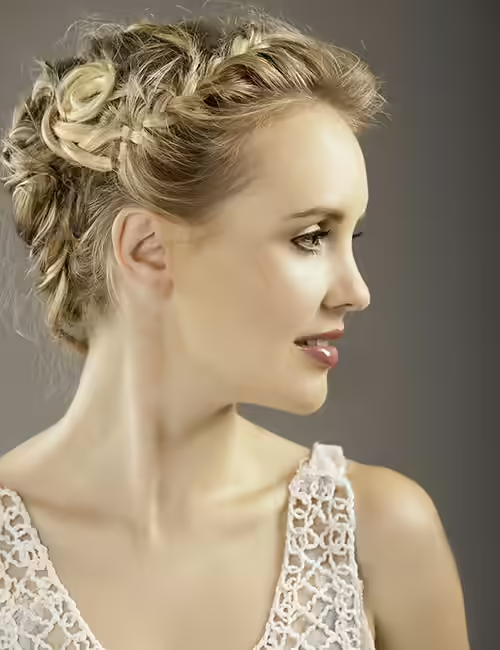
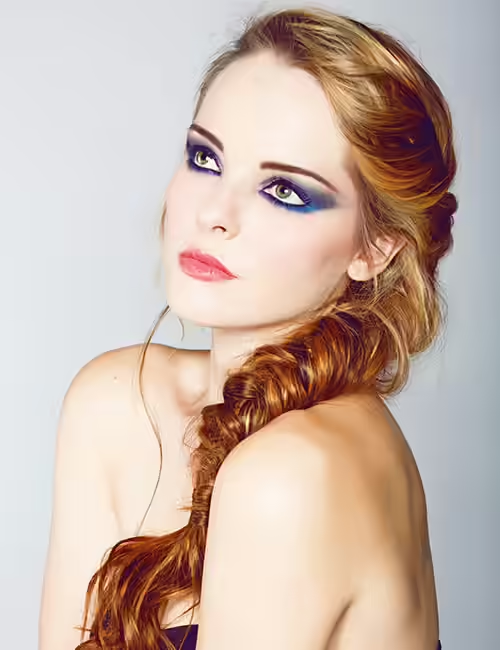
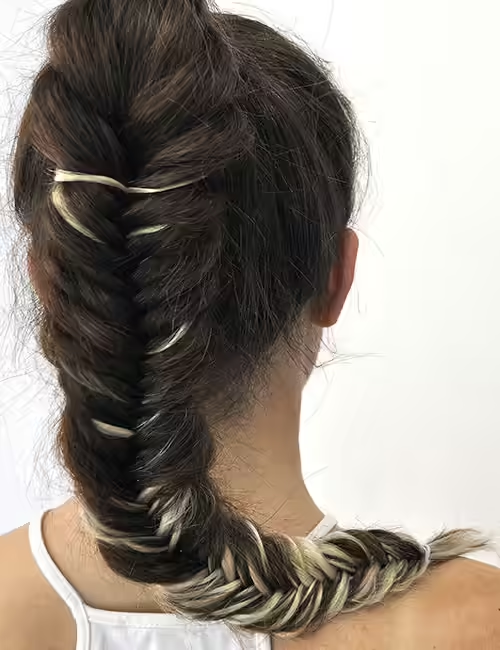
2. Fishtail Braided Bun: Effortlessly Chic
This sophisticated style combines the intricate detail of a fishtail braid with the elegance of a bun. Perfect for pageants or formal events, it keeps hair secure while looking stunning.
What You’ll Need:
- Hair elastic
- Hairpins
- Light-hold hairspray
How to Style:
- Start by brushing out tangles and creating a side part.
- Divide the hair into two equal sections.
- Take a thin strand from the outer edge of the left section and cross it under to join the right section.
- Repeat on the opposite side, alternating strands until you reach the nape.
- Gather the braid into a bun and secure it with pins. Finish with a spritz of hairspray for hold.
Fun Fact: This style works wonders on both straight and curly hair!
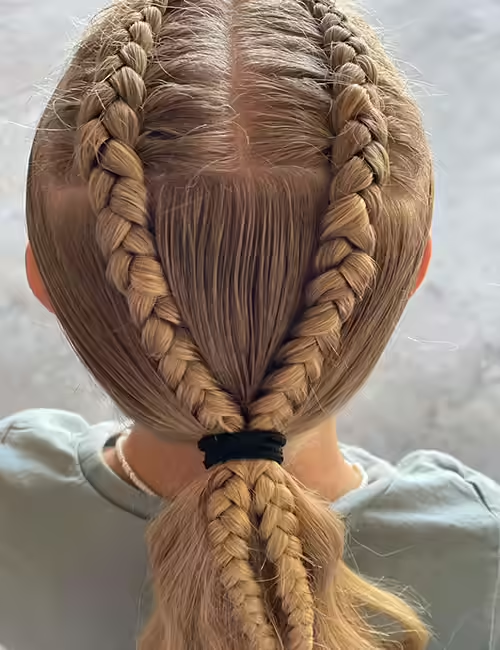
3. Twin Dutch Braids: Bold and Playful

Also known as “inside-out” braids, twin Dutch braids give a bold, voluminous look. They’re practical for keeping unruly hair in check while adding a sporty yet stylish touch.
What You’ll Need:
- Hairbrush
- Hair elastic
- Spray water bottle
How to Style:
- Lightly dampen the hair with a spray bottle to smooth flyaways.
- Part the hair down the middle, securing one side out of the way.
- Divide the other side into three sections. Cross the right strand under the middle, followed by the left strand.
- Continue braiding, incorporating additional hair as you go. Secure with an elastic.
- Repeat on the other side for symmetrical braids.
Parent Hack: These braids are ideal for active days—whether she’s running around the playground or practicing gymnastics.
4. Upside-Down Twin Dutch Bun: Unique and Fun
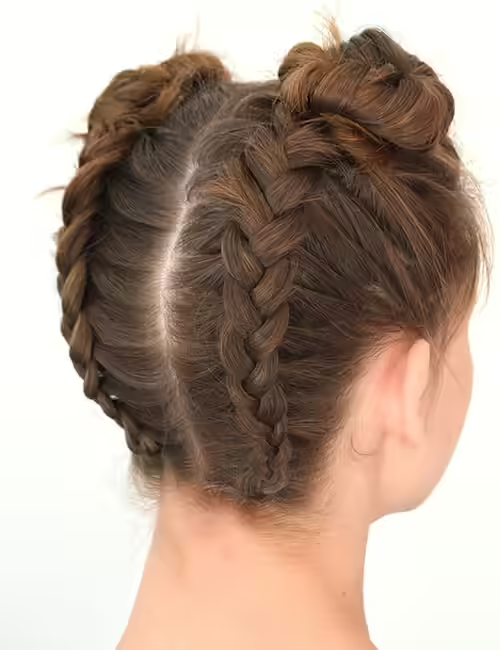
For moms seeking a unique updo, this quirky style is a winner. The combination of braids and buns creates a playful yet polished look that’s perfect for school or casual outings.
What You’ll Need:
- Hair elastics
- Rattail comb
- Hairpins
How to Style:
- Brush out tangles and divide the hair horizontally from ear to ear. Clip the top section away.
- Create a Dutch braid starting at the nape, working upward toward the crown. Secure with an elastic.
- Gather the braid and remaining hair into a high ponytail. Twist the ponytail into a bun and secure with pins.
- Repeat on the other side for matching buns.
Styling Tip: Leave a few wispy strands loose for a softer, more relaxed vibe.
5. Side-Braided Low Bun: Sweet and Sophisticated
This romantic style pairs beautifully with dresses and floral accessories. It’s easy to achieve and offers endless opportunities for customization.
What You’ll Need:
- Hair elastic
- Hairpins
- Hairspray
How to Style:
- Brush the hair and create a deep side part.
- Begin a side braid near the hairline, gradually adding sections as you move toward the nape.
- Once you reach the end, gather the rest of the hair into a low ponytail.
- Wrap the ponytail into a bun and secure with pins. Tease the edges slightly for a softer finish.
Accessorize: Decorate the bun with ribbons, pearls, or fresh flowers for added charm.
6. Braided Space Buns with Bangs: Retro Vibes

Space buns are back in fashion, and they’re cuter than ever! Paired with bangs, this retro-inspired style is playful, youthful, and oh-so-fun.
What You’ll Need:
- Hairbrush
- Hair elastic
How to Style:
- Brush out tangles and part the hair down the middle, leaving the bangs free.
- Gather each half into a high ponytail and secure with an elastic.
- Braid each ponytail and wrap them around their base to form buns. Secure with another elastic.
- Style the bangs neatly for a finished look.
Why Kids Love It: The bubbly, carefree vibe makes this style a hit at birthday parties and playdates.
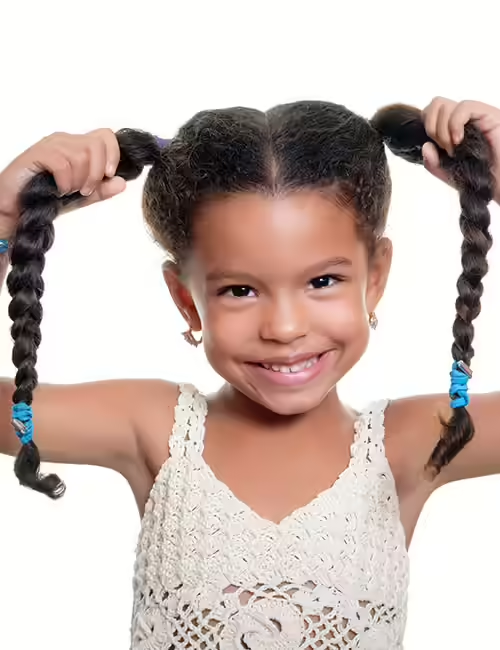
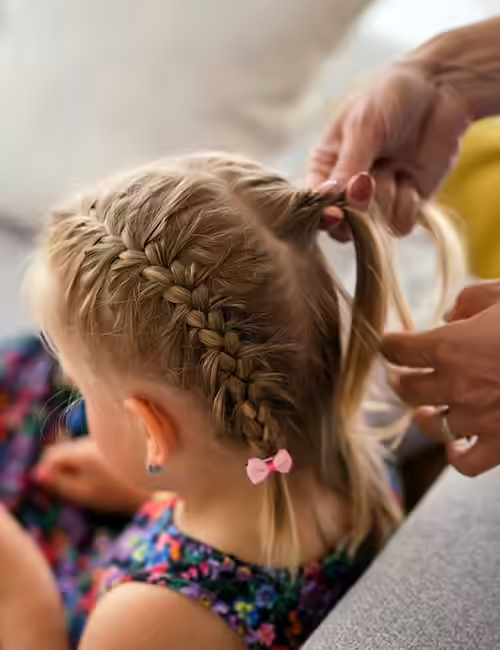
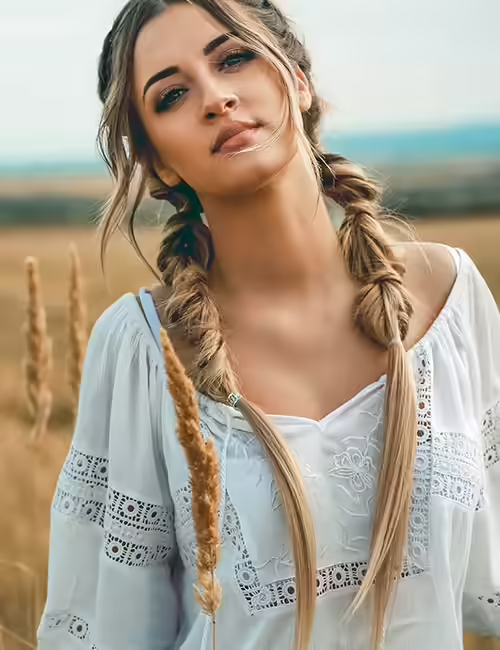
7. French Braided Pigtails: Classic Meets Cute
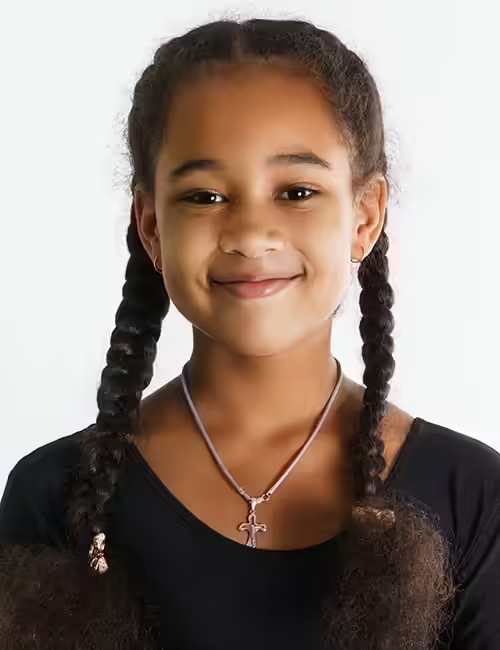
A timeless favorite, French braided pigtails are both practical and adorable. They keep hair off the face while showcasing its length and texture.
What You’ll Need:
- Hairbrush
- Hair elastic
- Spray water bottle
How to Style:
- Detangle the hair and part it down the middle.
- Starting at the crown, divide one side into three sections. Cross the right strand over the middle, then the left.
- Gradually add more hair as you braid downward. Secure the braid with an elastic.
- Repeat on the other side for symmetrical pigtails.
Historical Note: Did you know French braids became popular among European aristocrats in the 1800s as a sign of wealth and status?
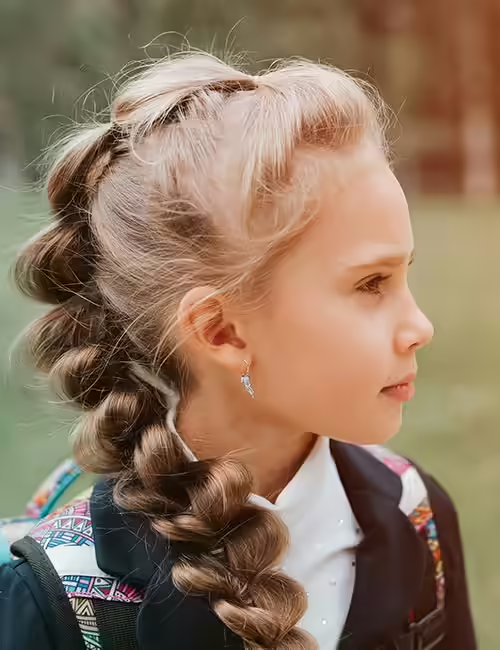
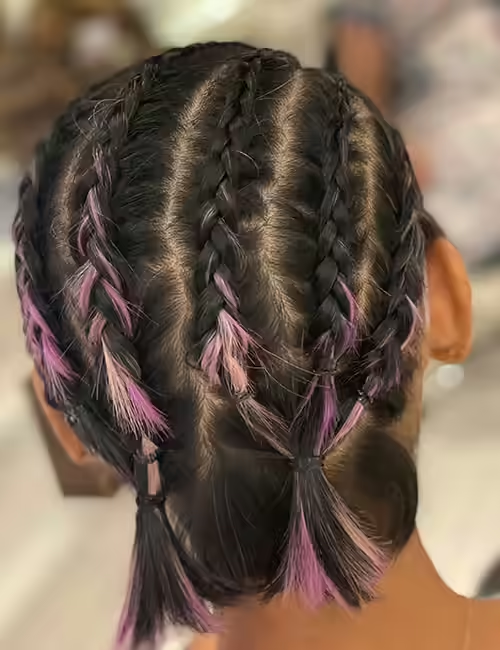
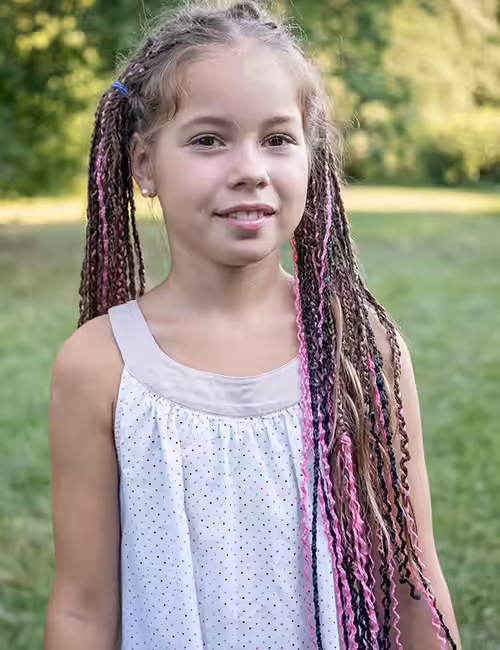
8. Twin Bubble Braids: Funky and Fun
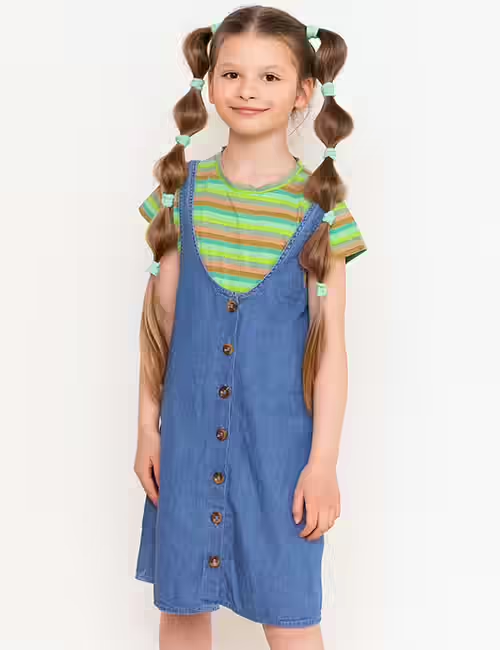
These playful braids are a favorite among kids who love color and creativity. The “bubbles” created by colorful elastics add a whimsical touch to any outfit.
What You’ll Need:
- Colorful elastics
- Hairbrush
- Lightweight styling cream
- Hairspray
How to Style:
- Apply styling cream to tame frizz and brush the hair smoothly.
- Part the hair down the middle and tie each side into a high ponytail using a colorful elastic.
- Place additional elastics every few inches along the length of the ponytails.
- Gently tug at the sections between the elastics to create “bubbles.”
- Finish with a light mist of hairspray to lock everything in place.
Color Pop: Mix and match elastic colors to match her outfit or mood!
8. Twin Bubble Braids: Playful and Colorful
Bubble braids are the epitome of fun and creativity, making them a favorite among kids who love vibrant, eye-catching styles. The colorful elastics add a playful pop of color that complements any outfit or mood.
What You’ll Need:
- Colorful hair elastics
- Hairbrush
- Lightweight styling cream
- Hairspray
How to Style:
- Start by brushing out tangles and applying a lightweight styling cream to tame frizz.
- Part the hair down the middle, from the forehead to the nape.
- Gather each side into a high ponytail and secure with a colorful elastic.
- Place additional elastics every few inches along the length of the ponytails.
- Gently tug at the sections between the elastics to create “bubbles.”
- Finish with a spritz of hairspray to lock everything in place.
Why Kids Love It: The bubbly texture and bright colors make this style a hit at birthday parties, playdates, or casual outings.
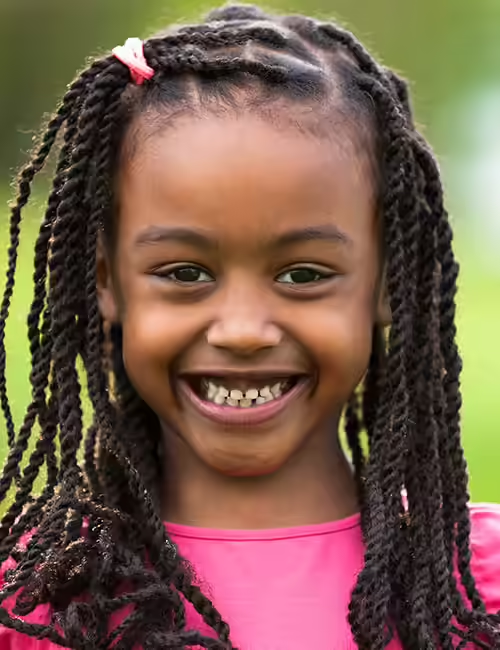
9. Twisted Box Braids: Bold and Cultural
This intricate style has deep cultural roots, originating in South Africa around 3500 BC. Twisted box braids are not only stylish but also a celebration of heritage and individuality.
What You’ll Need:
- Hair elastic
- Leave-in conditioner
How to Style:
- Ensure the scalp and hair are clean and moisturized. Apply leave-in conditioner before gently detangling.
- Divide the hair into four equal sections—two on the crown and two at the back.
- Clip away three sections and work on one at a time.
- Split the section into smaller subsections, then twist them before wrapping them around each other. Secure the ends with an elastic.
- Repeat the process for all sections.
- Gather the twisted braids into a side ponytail or leave them loose for a bold look.
Cultural Note: Historically, these braids were used to signify marital status, social standing, and even financial independence.
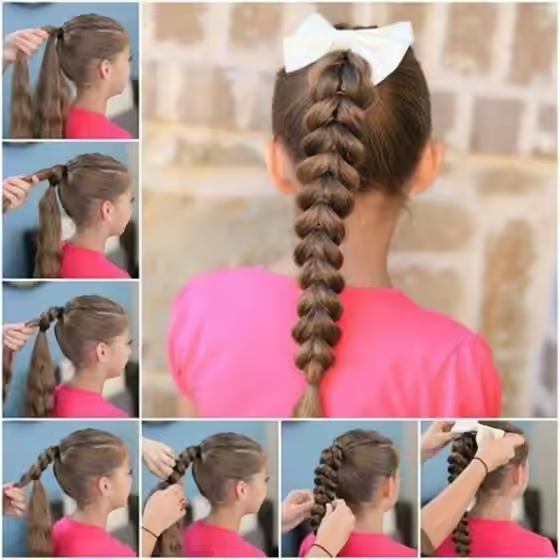
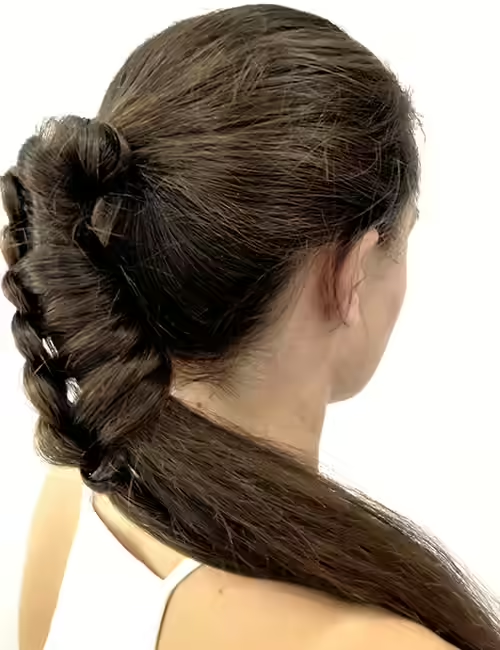
10. Pull-Through Braid: Effortlessly Chic
This trendy braid is perfect for moms looking for a quick yet stylish option. It’s easy to achieve and requires minimal effort while delivering maximum impact.
What You’ll Need:
- Hair elastics
- Hairbrush
- Lightweight hairspray
How to Style:
- Brush the hair to remove tangles.
- Create a high ponytail at the top of the head using the front section of the hair. Secure it with an elastic.
- Make a second ponytail below the first and secure it.
- Unclip the first ponytail, divide it into two parts, and pull the second ponytail through the gap toward the face. Secure with a clip.
- Continue creating ponytails, pulling each one through the previous section until you reach the end.
- Loosen the braids slightly by gently tugging on them, then finish with a spritz of hairspray.
Pro Tip: Add colorful elastics for a playful twist.
11. Half-Down Braids: Elegant Simplicity
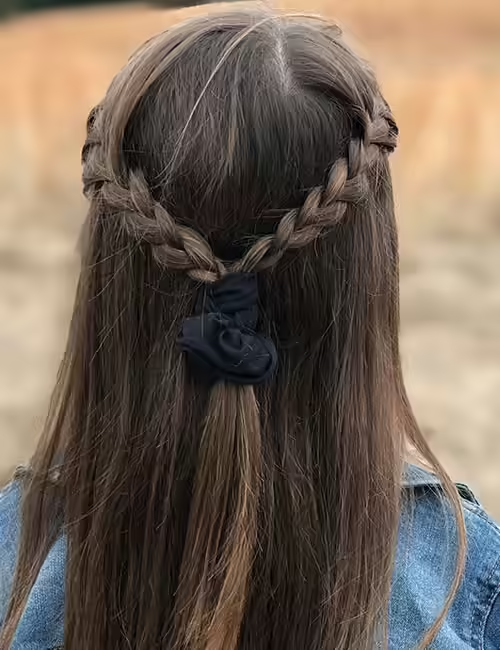
This timeless style combines elegance and ease, making it a go-to choice for little girls who want to feel like princesses without too much fuss.
What You’ll Need:
- Hair elastic
- Hairbrush
How to Style:
- Lightly brush the hair and part it on one side.
- Gather the front section of hair and divide it into three parts.
- Begin braiding by crossing the right strand over the middle, followed by the left.
- Secure the braid with an elastic.
- Repeat on the other side, then gather both braids together and tie them with another elastic.
- Leave the rest of the hair flowing freely for a soft, romantic look.
Accessorize: Tie a ribbon around the base of the braids for added charm.
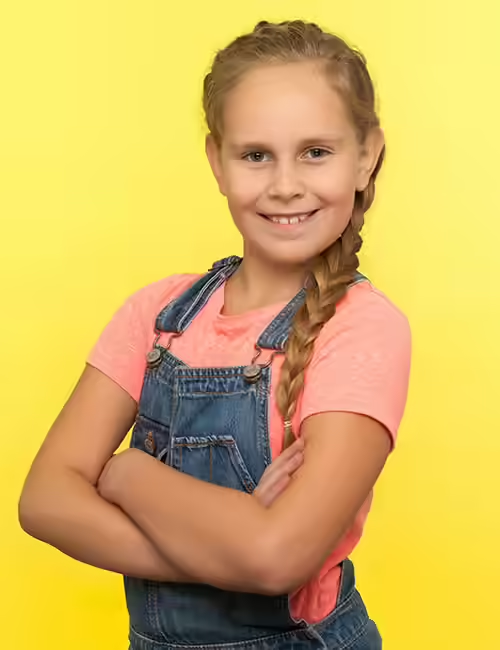
12. Side Braid: Perfect for Spring
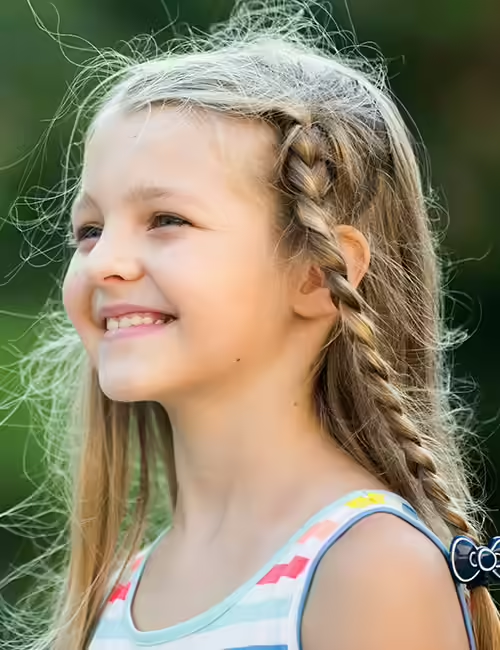
A single side braid is a versatile and breezy style that works beautifully for outdoor adventures or special occasions. Decorate it with flowers or ribbons for a seasonal touch.
What You’ll Need:
- Hairbrush
- Hair elastic
How to Style:
- Brush the hair and part it deeply on one side.
- Gather hair from the opposite side and divide it into three sections.
- Begin braiding by crossing the right strand over the middle, followed by the left.
- Continue braiding until you reach the ends, then secure with an elastic.
Styling Idea: Tuck the braid behind the ear and accessorize with floral clips for a whimsical vibe.
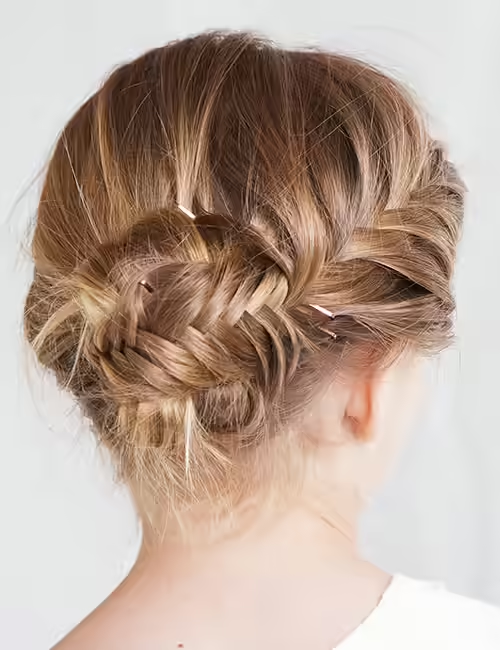
13. Dutch Braided Crown: Regal and Sophisticated
Transform your little one into a queen with this polished Dutch braided crown. It’s elegant, secure, and perfect for formal events.
What You’ll Need:
- Paddle brush
- Rattail comb
- Hairpins
- Medium-hold hairspray
How to Style:
- Brush the hair to remove tangles and create a deep side part.
- Pick up a small section near the hairline and divide it into three strands.
- Start a Dutch braid by crossing the right strand under the middle, followed by the left.
- Gradually add more hair as you move along the hairline.
- Once you reach the opposite ear, secure the braid with an elastic.
- Repeat on the other side and lay the braids across the top of the head, securing them with pins.
- Gently pull on the edges of the braids to widen them for a fuller effect.
Finishing Touch: Use hairspray to smooth stray hairs and maintain the regal appearance.
14. Cornrow Braids: Practical and Cultural
Cornrows are a practical solution for managing thick, unruly hair while paying homage to their rich cultural history. Originating in Africa, they’re known for their intricate patterns and protective qualities.
What You’ll Need:
- Leave-in conditioner
- Edge control
- Hair elastic
- Styling oil or butter
- Rat-tail comb
How to Style:
- Detangle the hair using a leave-in conditioner and apply styling oil or butter to lock in moisture.
- Divide the hair into rows from front to back.
- Part the first row into three strands and begin braiding close to the scalp.
- As you braid, incorporate small sections of hair from the row into the stitch.
- Continue braiding until you reach the ends, then secure with an elastic.
- Repeat the process for each row.
Cultural Insight: Cornrows have historically been used to indicate age, wealth, marital status, and even religion within communities.
15. French Wrap-Around Braid: Chic and Functional
This classic French wrap-around braid keeps hair neatly tucked away while adding a touch of sophistication. It’s ideal for keeping bangs and flyaways out of your child’s face.
What You’ll Need:
- Hair elastic
- Hairbrush
How to Style:
- Brush out tangles and part the hair on one side.
- Gather a small section of hair from the front and divide it into three parts.
- Begin braiding by crossing the right strand over the middle, followed by the left.
- Gradually add more hair as you move around the head.
- Once you reach the opposite ear, continue braiding all the remaining hair and secure with an elastic.
Quick Fix: Use edge control to tame baby hairs for a sleek finish.
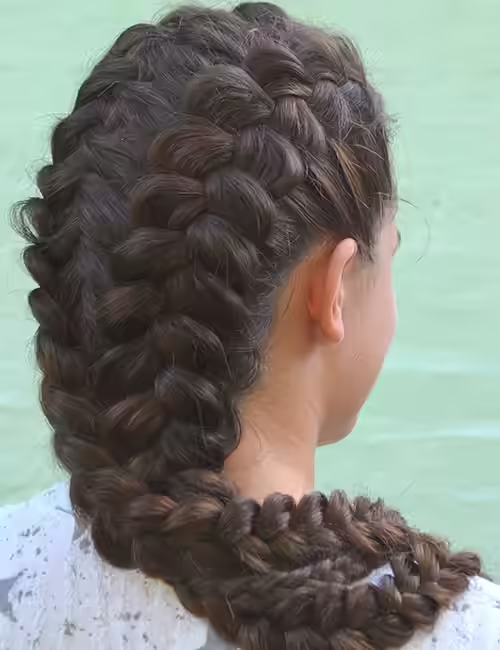
16. Mohawk Dutch Braid: Edgy and Confident
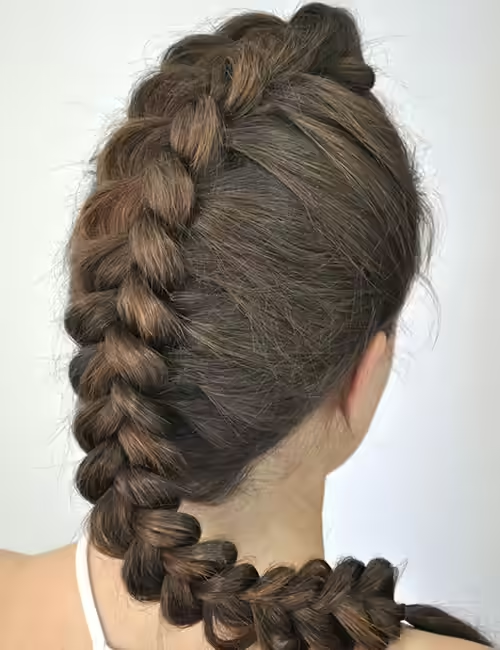
For the daring little ones, this mohawk-inspired Dutch braid adds a bold, confident flair. It’s a standout style that’s sure to turn heads.
What You’ll Need:
- Paddle brush
- Hair elastics
- Light-hold hairspray
How to Style:
- Brush the hair straight back.
- Pick up a section of hair from the crown and divide it into three strands.
- Begin a Dutch braid by crossing the right strand under the middle, followed by the left.
- Gradually add more hair to the braid as you move down the center of the head.
- Continue braiding until you reach the nape, then secure with an elastic.
- Finish with a light mist of hairspray to hold the style in place.
Why It Works: This edgy look is perfect for showcasing personality and confidence.
17. Double High Braided Ponytails: Classic with a Twist
These double high braided ponytails are a playful take on a classic style. They’re fun, youthful, and easy to achieve.
What You’ll Need:
- Hair elastics
- Comb
How to Style:
- Part the hair down the middle.
- Gather each side into a high ponytail and secure with an elastic.
- Braid each ponytail using a regular three-strand technique and secure the ends with elastics.
Fun Fact: This style is reminiscent of pigtails but with an elevated, braided twist.
18. Heart Braid: Adorable and Unique
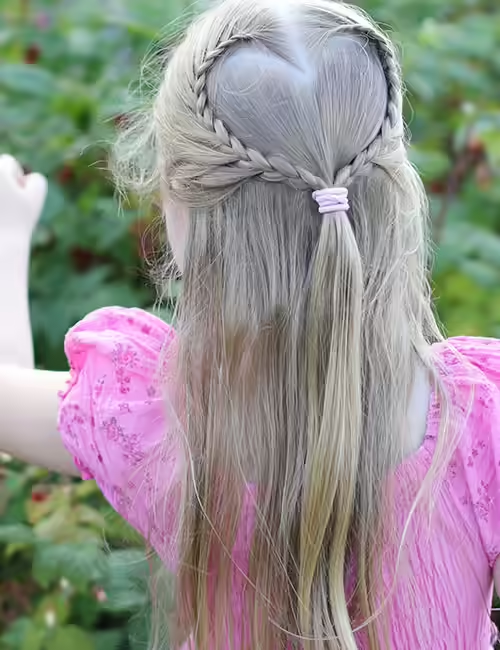
This heart-shaped braid is a delightful way to show love and creativity. It’s perfect for Valentine’s Day or any occasion where you want to spread joy.
What You’ll Need:
- Hairbrush
- Hair elastic
How to Style:
- Brush the hair and part it down the middle.
- Gather a section of hair from one side and divide it into three parts.
- Begin braiding in the shape of a heart, gradually adding more hair as you go.
- Once the heart pattern is complete, secure the braid with an elastic.
- Repeat on the other side and join the two braids together to form the heart.
Why It’s Special: The heart design adds a whimsical, personalized touch to any hairstyle.
19. Double Waterfall Braids: Elegant and Intricate
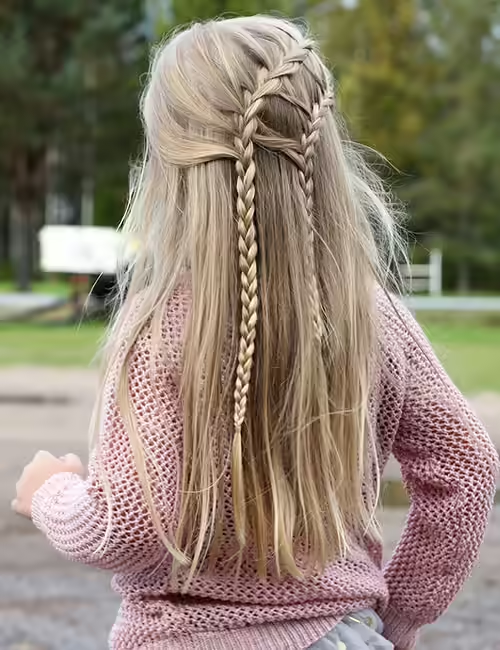
Waterfall braids are a stunning choice for long-haired little ones. This double version takes the elegance up a notch, creating a cascading effect that’s simply breathtaking.
What You’ll Need:
- Hairbrush
- Hair elastic
How to Style:
- Brush out tangles and part the hair deeply on one side.
- Begin a waterfall braid by gathering three sections of hair near the hairline.
- Cross the back strand over the middle, followed by the front strand.
- Drop the front strand and pick up a new section just behind it.
- Continue this pattern, alternating between dropping and picking up strands, until you reach the nape.
- Repeat on the other side, connecting the two braids at the back.
Why It’s Stunning: The intricate weaving creates a lace-like effect that’s both delicate and striking.
20. Softball Braid Ponytail: Sporty and Secure
Perfect for active kids, this softball braid ponytail keeps hair securely in place during sports or outdoor activities.
What You’ll Need:
- Hairbrush
- Hair elastic
How to Style:
- Brush out tangles and part the hair down the middle.
- On one side, divide the hair horizontally about 4-5 inches above the nape.
- Begin a Dutch braid, gradually adding hair as you move toward the horizontal part.
- Once you reach the partition, continue braiding without adding new sections.
- Secure the braid with an elastic and repeat on the other side.
- Gather all remaining hair, including the braids, into a high ponytail.
Why It’s Practical: This style ensures no stray hairs interfere with playtime or practice.
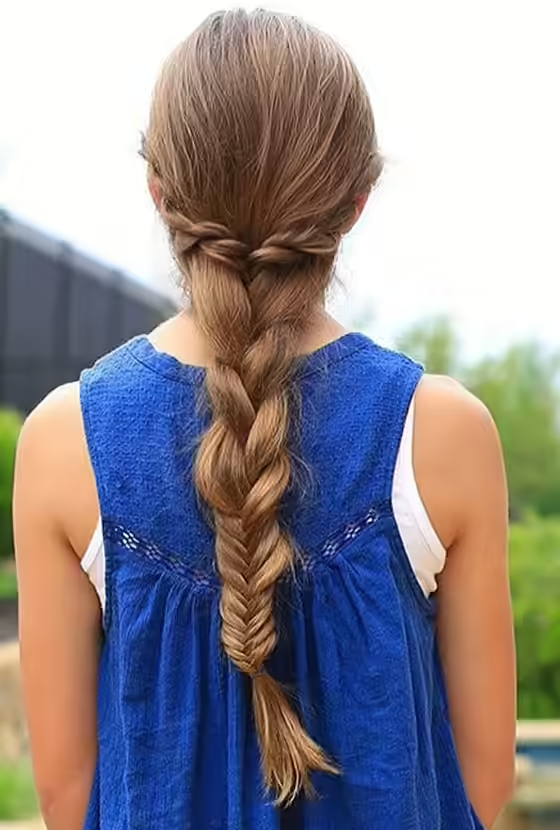
21. Twisted Braid Ponytail: A Touch of Elegance
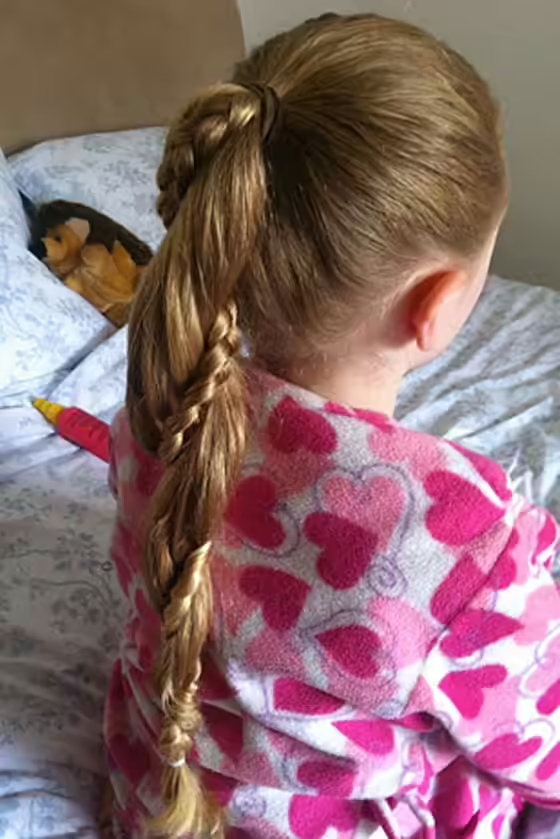
This simple yet chic style combines the practicality of a ponytail with the delicate charm of a twisted braid. It’s perfect for school or casual outings, adding a hint of sophistication to your little one’s look.
What You’ll Need:
- Hairbrush
- Hair elastics
How to Style:
- Brush out all knots and tangles, then tie the hair into a high ponytail.
- Pick up a 3-inch section of hair from the ponytail and braid it tightly down to the ends. Secure with an elastic.
- Twist the braid around the base of the ponytail 3-4 times, removing the elastic at the end of the braid as you go.
- Tie the end of the braid and the ponytail together with another elastic to secure the look.
Why It’s Practical: This style keeps hair neat while adding a playful twist—literally!
22. Half-Up Crown Braid: Angelic and Ethereal
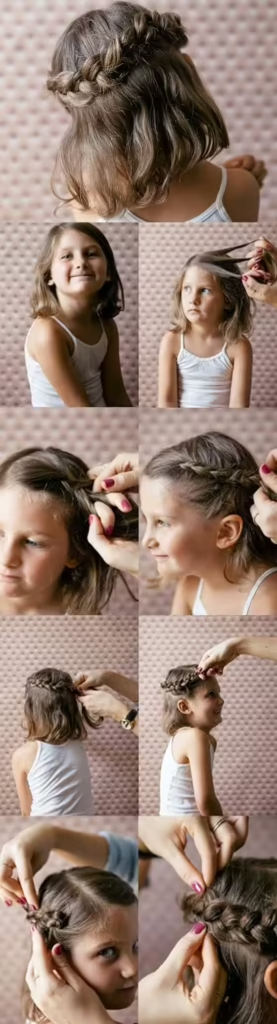
Transform your little girl into a fairy-tale princess with this half-up crown braid. The positioning of the braid creates a halo-like effect that’s both elegant and whimsical.
What You’ll Need:
- Hairbrush
- Texturizing spray
- Bobby pins
How to Style:
- Detangle the hair and spritz on texturizing spray for added grip.
- Part the hair on one side and pick up three small sections near the hairline.
- Begin a French braid, adding hair only from the top side as you move toward the back of the head.
- Continue braiding around the circumference of the head until you reach the opposite side, securing with bobby pins.
- Loosen the braid slightly to create volume and softness.
Pro Tip: Add flowers or ribbons for a magical, ethereal touch.
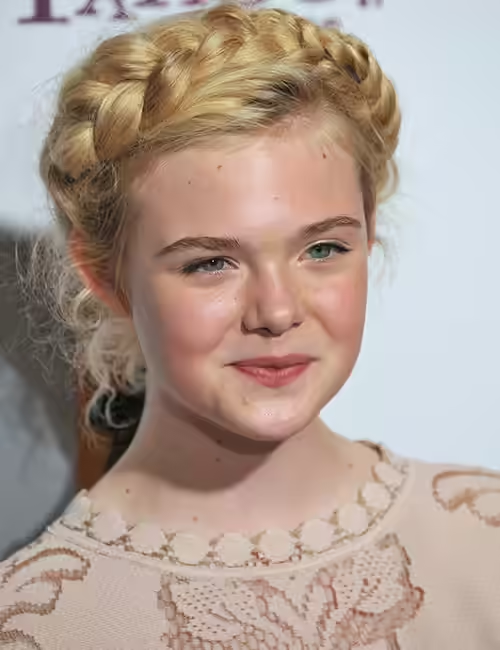
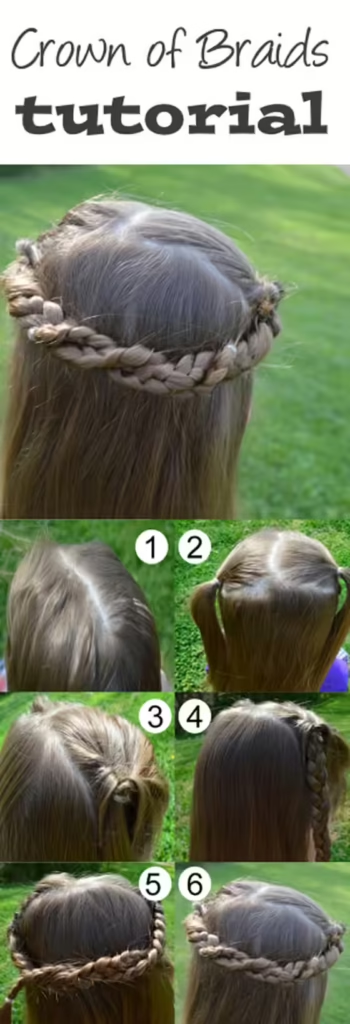
23. Crown of Braids: Fit for Royalty
This intricate crown of braids is perfect for special occasions, giving your little one the regal look she deserves without needing an actual tiara.
What You’ll Need:
- Texturizing spray
- Hair elastics
How to Style:
- Part the hair down the middle and create a horizontal part from ear to ear to separate the front and back sections.
- Tie two ponytails with the front section of hair, one on each side.
- Flip each ponytail through a gap above the elastic to create a “topsy tail” effect.
- Braid each ponytail down to the ends and secure with elastics.
- Tie the braids into a knot at the back of the head, crossing them over like shoelaces. Secure with bobby pins.
Why It’s Unique: This style mimics the elegance of a royal crown, making it perfect for weddings or formal events.
24. Knotted Braids: Functional and Fashionable
These knotted braids are not only visually striking but also incredibly secure, ensuring they stay intact throughout the day. They’re perfect for active kids who need a durable style.
What You’ll Need:
- Texturizing spray
- Hair elastics
How to Style:
- Spritz texturizing spray all over the hair for hold.
- Part the hair down the middle and divide it vertically into two sections.
- From the front of one section, pick up a 2-inch section of hair and split it into two parts.
- Tie a single knot with the two sections, pulling it tight against the scalp.
- Add a 1-inch section of hair to the tails of the knot and repeat the process until you reach the nape.
- Secure with an elastic and repeat on the other side.
Quick Fix: These braids are ideal for keeping unruly hair in check during sports or outdoor activities.
25. Inverted Hearts Braided Ponytail: Playful and Sweet
This pull-through braid creates a series of inverted hearts, adding a whimsical touch to a classic ponytail. It’s easy to achieve and oh-so-cute!
What You’ll Need:
- Hairbrush
- Hair elastics
- Hair bow
How to Style:
- Brush out tangles and tie the hair into a high ponytail.
- Divide the ponytail horizontally into two sections (top and bottom).
- Split the top section into two parts, flip them under the bottom section, and secure with an elastic.
- Repeat the process, alternating sections, until you reach the end of the ponytail.
- Loosen the braid slightly for dimension and add a bow at the base for a finishing touch.
Why Kids Love It: The heart shapes make this style irresistibly adorable.
26. Ribboned Up Milkmaid Braids: Sporty and Sweet

Perfect for athletic girls, these milkmaid braids adorned with ribbons keep hair securely in place while adding a playful flair.
What You’ll Need:
- Ribbons (1/2 inch wide)
- Hair elastics
- Bobby pins
How to Style:
- Part the hair on one side and cut two ribbons, each twice the length of the hair.
- Divide the hair into two vertical sections and tie each into a low ponytail using the ribbons.
- Combine the ribbon ends with the ponytail and braid each section down to the ends.
- Wrap the braids across the top of the head, pinning them near the ears.
- Tie bows around the braids on both sides for a charming finish.
Why It Works: The ribbons add color and personality, making this style stand out.
27. Braided Buns: Innocence in Motion
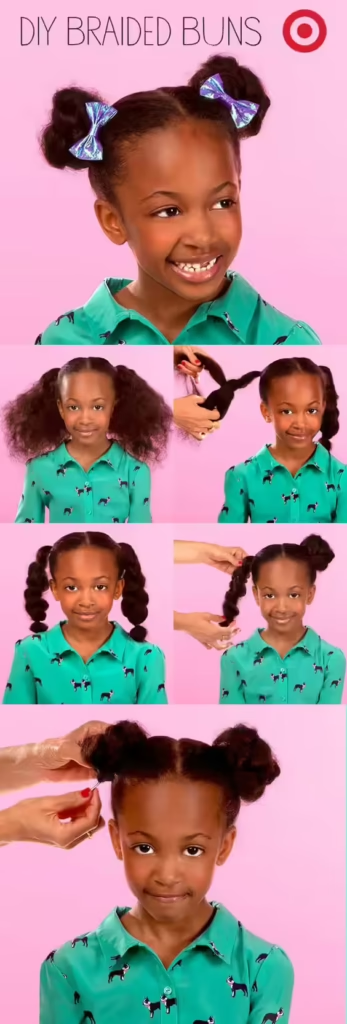
These braided buns are sweet, simple, and utterly adorable. They’re perfect for keeping hair neatly tucked away while maintaining a childlike charm.
What You’ll Need:
- Hair elastics
- Bobby pins
- Hair bows
How to Style:
- Part the hair down the middle and divide it into two sections.
- Tie each section into a ponytail and divide the ponytail into two strands.
- Twist and intertwine the strands, braiding them down to the ends and securing with an elastic.
- Roll the braids into buns and pin them securely to the head.
- Add a bow for an extra touch of sweetness.
Why It’s Timeless: This style is both functional and darling, making it a favorite among moms and kids alike.
28. Side Triple Flower Braids: Blooming Beauty
These flower-inspired braids are perfect for special occasions, especially if your little one is the flower girl at a wedding. They’re as sweet as they are stylish.
What You’ll Need:
- Texturizing spray
- Hair elastics
- Bobby pins
- Light-hold hairspray
How to Style:
- Part the hair down the middle and pick up a 2-inch section near the ear.
- Braid the section tightly and pancake one side of the braid.
- Roll the braid into a flower shape, securing it with bobby pins.
- Repeat the process with two more sections of hair next to the first flower.
- Finish with a spritz of light-hold hairspray to set the style.
Why It’s Special: The floral design adds a whimsical, romantic touch.
29. Fishtail Accented Ponytail: Sporty and Chic
This fishtail-accented ponytail is both sporty and stylish, making it a versatile option for any occasion.
What You’ll Need:
- Hair elastics
- Bobby pins
How to Style:
- Pick up a 4-inch section of hair from the crown and tie it into a small ponytail.
- Divide the ponytail into two sections and fishtail braid them, securing the ends with an elastic.
- Tie all the hair into a mid-level ponytail and wrap a thin section of hair around the base to conceal the elastic.
- Place the fishtail braid on top of the ponytail and pin it in place.
Why It’s Trendy: The fishtail accent adds a modern, edgy vibe to a classic ponytail.
30. Viking Braids: Edgy and Bold
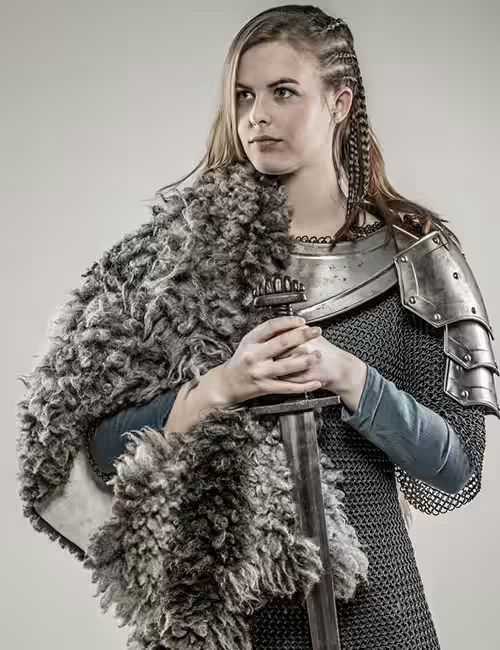
Channel warrior vibes with these messy Viking braids. They’re bold, edgy, and perfect for themed parties or Halloween costumes.
What You’ll Need:
- Hair crimper
- Rat-tail comb
- Sectioning clips
- Texturizing spray
- Hair gel
- Hairspray
How to Style:
- Crimp the hair for texture, then divide it into three vertical sections.
- Dutch braid each section, flipping the strands under and adding hair as you go.
- Leave the braids loose once they pass the ears, and brush out the remaining hair for a messy finish.
- Set with hairspray to prevent unraveling.
Historical Note: Viking braids were originally worn by warriors to keep their hair out of their faces during battle.
31. Bow French Braid: Classic with a Twist
A single French braid is timeless, but adding a bow elevates it to fairy-tale status. This style is perfect for little girls who love feeling like princesses.
What You’ll Need:
- Hairbrush
- Rat-tail comb
- Hair elastic
- Hair bow
How to Style:
- Brush all the hair back and pick up a 2-inch section from the center of the forehead. Divide it into three parts.
- Begin a French braid, adding more hair with each stitch using the rat-tail comb for precision.
- Once you’ve run out of hair to add, continue braiding to the ends and secure with an elastic.
- Pin the bow at the end of the braid for a whimsical finish.
Why It’s Magical: The bow adds a playful yet elegant touch, making this style perfect for birthdays or themed parties.
32. Nautical Dutch Braid: Sailor-Inspired Sweetness

Imagine your little one in a sailor outfit—adorable, right? Pair it with this nautical Dutch braid, and you’ve got a look that’s as sweet as can be.
What You’ll Need:
- Hair elastic
- Hair bow
How to Style:
- Part the hair down the middle and section away the front hair along the hairline.
- Pick up a 2-inch section at the front and divide it into three parts.
- Dutch braid the sections by flipping the side strands under the middle strand, adding more hair with each stitch.
- Once the braid reaches the back, continue braiding to the ends.
- Comb back the sectioned hair and tie everything into a low ponytail. Add the bow for a finishing touch.
Why It Works: This style is both practical and charming, perfect for playdates or casual outings.
33. Infinity Fishtail Braid: Trendy and Textured
The infinity fishtail braid is a trendy twist on classic braids, offering a cool, textured look that’s ideal for active kids.
What You’ll Need:
- Spray water bottle
- Hair elastic
How to Style:
- Wet the hair slightly by spraying water all over. Comb it back neatly.
- Pick up all the hair from between the temples and divide it into two equal sections.
- Take a thin section from the left side, flip it under the left section, and over the right section. Hold onto this section.
- Pick up another thin section from the right side, combine it with the first, and flip it under the right section and over the left.
- Repeat until the braid reaches the nape, then switch to a regular fishtail braid. Secure with an elastic.
- Loosen the braid for added dimension.
Quick Tip: To make the braid last longer, wrap it in a silk scarf overnight to minimize friction.
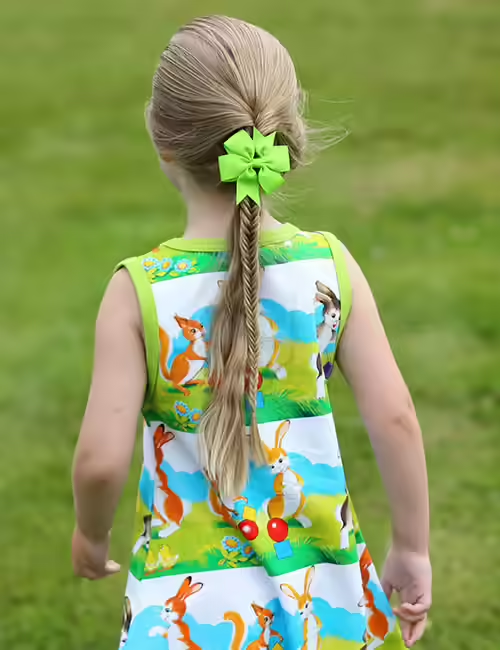
34. Fluffy Fishtail Braid: Playful and Voluminous
This fluffy fishtail braid combines texture and volume, making it a fun and stylish choice for everyday wear.
What You’ll Need:
- Fine-toothed comb
- Teasing brush
- Hair elastics
- Small hair bow
How to Style:
- Backcomb the hair for volume and tie it into a high ponytail.
- Tease the top half of the ponytail, then smooth the front section for a polished look.
- Divide the ponytail into two sections about a third of the way down.
- Fishtail braid the sections by alternating thin strands from the outer edges to the inner sides.
- Secure the braid with an elastic and attach a small bow at the end.
Why Kids Love It: The fluffy texture gives this braid a playful vibe, perfect for pairing with casual outfits.
35. Dorothy Braids: Timeless and Adorable

Inspired by Dorothy from The Wizard of Oz, these pigtails are as cute as they come. They’re perfect for school or playdates.
What You’ll Need:
- Hair elastics
- Red ribbons
How to Style:
- Part the hair down the middle and divide it vertically into two sections.
- From the left section, pick up a small piece near the parting and start twisting it, adding more hair along the way.
- Once past the ear, divide the remaining hair into three parts and braid it to the ends. Secure with an elastic.
- Repeat on the right side. Loosen the braids slightly for a relaxed look.
Why It’s Iconic: These braids bring a nostalgic charm that never goes out of style.
36. Bubble Braid: Quick and Easy
Short on time? This bubble braid can be done in minutes, making it a lifesaver for busy mornings.
What You’ll Need:
- Fine-toothed comb
- Hair elastics
- Bobby pins
How to Style:
- Comb all the hair back and tie half of it into a ponytail.
- Wrap a thin section of hair around the base to conceal the elastic and pin it in place.
- Combine the loose hair with the ponytail and secure with another elastic.
- Pull the sections between the elastics to create “bubbles.” Repeat until all the hair is braided.
- Finish with a fishtail braid and wrap a section of hair around the final elastic.
Why It’s Practical: This style is quick, easy, and still looks adorable.
37. French Micro Braids: Chic and Detailed
These micro braids are intricate yet simple enough to achieve at home. They’re perfect for keeping hair neat during winter activities.
What You’ll Need:
- Texturizing spray
- Rat-tail comb
- Hair elastics
How to Style:
- Spray texturizing spray all over the hair and part it down the middle.
- Pick up a 3-inch section from the front and divide it into three parts.
- French braid the section, adding more hair with each stitch until you reach the nape. Secure with an elastic.
- Continue braiding small sections of the tail until all the hair is braided. Repeat on the other side.
Why It’s Stylish: The detailed braids add a chic, polished look to any outfit.
38. Accented Dutch Braid Ponytail: Holiday Glam
This intricate Dutch braid transitions into a messy ponytail, creating a festive holiday look.
What You’ll Need:
- Hair elastic
- Bobby pins
- Sea salt spray
- Bejeweled accessories
How to Style:
- Part the hair to one side and pick up a 3-inch section near the parting.
- Dutch braid the section, flipping the strands under and adding more hair with each stitch.
- Once the braid reaches the nape, secure it with an elastic.
- Fishtail braid a small section of the ponytail and pancake both braids for a messy texture.
- Add sea salt spray and accessorize with bejeweled pins for extra sparkle.
Why It’s Festive: This style combines elegance and fun, perfect for holiday gatherings.
39. Simple Dutch Braid Ponytail: Mature and Professional
For occasions that call for a slightly more mature look, this Dutch braid ponytail is both professional and stylish.
What You’ll Need:
- Hairbrush
- Rat-tail comb
- Hair elastic
- Bobby pins
How to Style:
- Brush all the hair back and create two vertical partitions from the temples to the nape.
- Pick up a 3-inch section from the center and divide it into three parts.
- Dutch braid the section, adding hair only from the center partition.
- Once the braid reaches the nape, gather all the hair into a low ponytail.
- Pancake the braid for width and wrap a thin section of hair around the base to conceal the elastic.
Why It’s Versatile: This style strikes the perfect balance between maturity and playfulness.
40. Mixed Braid: Creative and Fun
Can’t decide on one braid? Why not mix them up! This style combines French twists, three-strand braids, and fishtails for a unique look.
What You’ll Need:
- Hair elastic
How to Style:
- Part the hair down the middle and pick up a 2-inch section from the front.
- French twist the section, intertwining the strands and adding more hair with each twist.
- Secure with an elastic and repeat on the other side.
- Remove the elastics and split all the hair into three sections. Braid halfway down, then switch to a fishtail braid.
- Loosen the braid for a relaxed, boho vibe.
Why It’s Unique: This style showcases creativity and allows for endless customization.
41. Twisted Mohawk: Edgy and Bold
If you’re looking to experiment with something bold, this twisted mohawk is sure to turn heads.
What You’ll Need:
- Hair elastic
- Hairbrush
- Bobby pins
How to Style:
- Brush out tangles and separate the hair into three sections: one for the mohawk and two side sections.
- Braid the side sections and secure them.
- Divide the mohawk section into smaller sections and twist each tightly, securing with elastics and bobby pins.
- Repeat until the entire mohawk is covered.
Why It’s Eye-Catching: This edgy style is perfect for kids who love standing out from the crowd.
Final Thoughts: Braids That Bring Joy
From classic French braids to edgy twisted mohawks, these 41 styles offer endless possibilities for creativity and fun. Whether you’re preparing for a special occasion or just want to add some flair to everyday life, there’s a braid here to suit every personality and preference. So grab your combs, elastics, and accessories—it’s time to transform your little one into the star she was born to be!
Which braid are you most excited to try? Share your thoughts in the comments below—we’d love to hear about your favorite styles!
Stay tuned for the continuation of our list, featuring even more adorable braids like fluffy fishtails, Dorothy-inspired pigtails, and bubble braids! Which style are you most excited to try? Share your thoughts in the comments—we’d love to hear from you!
Stay tuned for the continuation of our list, featuring even more adorable braids like fishtail crowns, halo braids, and more! Which style are you most excited to try? Share your thoughts in the comments—we’d love to hear from you!
Hair Care Tips for Braided Hairstyles
To ensure your little one’s braids stay healthy and beautiful, follow these tips:
- Moisturize Regularly: Use leave-in conditioners or oils to prevent dryness.
- Protect at Night: Wrap hair in a silk scarf or use a satin pillowcase to reduce friction.
- Avoid Tight Braids: Ensure braids aren’t too tight to prevent discomfort or damage.
- Refresh as Needed: Spritz with water or a lightweight spray to revive curls or waves within the braids.
Key Takeaways
- Braids are a versatile and timeless way to style your child’s hair.
- With 41 options to choose from, there’s something for every occasion and preference.
- Proper care ensures braids remain comfortable and healthy for your little one.
Infographic: Super Cute and Easy Braided Hairstyles for Young Girls
Check out our visual guide summarizing the top braids and their key steps. Perfect for quick reference!
Frequently Asked Questions
Q: How often should I re-braid my child’s hair?
A: Depending on the style, braids can last anywhere from 1 to 2 weeks. Re-braid when they start to look messy or lose their shape.
Q: Can I braid wet hair?
A: It’s best to braid damp (not soaking wet) hair to avoid breakage and ensure longevity.
Q: Are braids suitable for all hair types?
A: Absolutely! With proper technique and products, braids work beautifully on straight, wavy, curly, and coily textures.
Which braid are you most excited to try on your little princess? Share your thoughts in the comments—we’d love to hear about your favorite styles!
