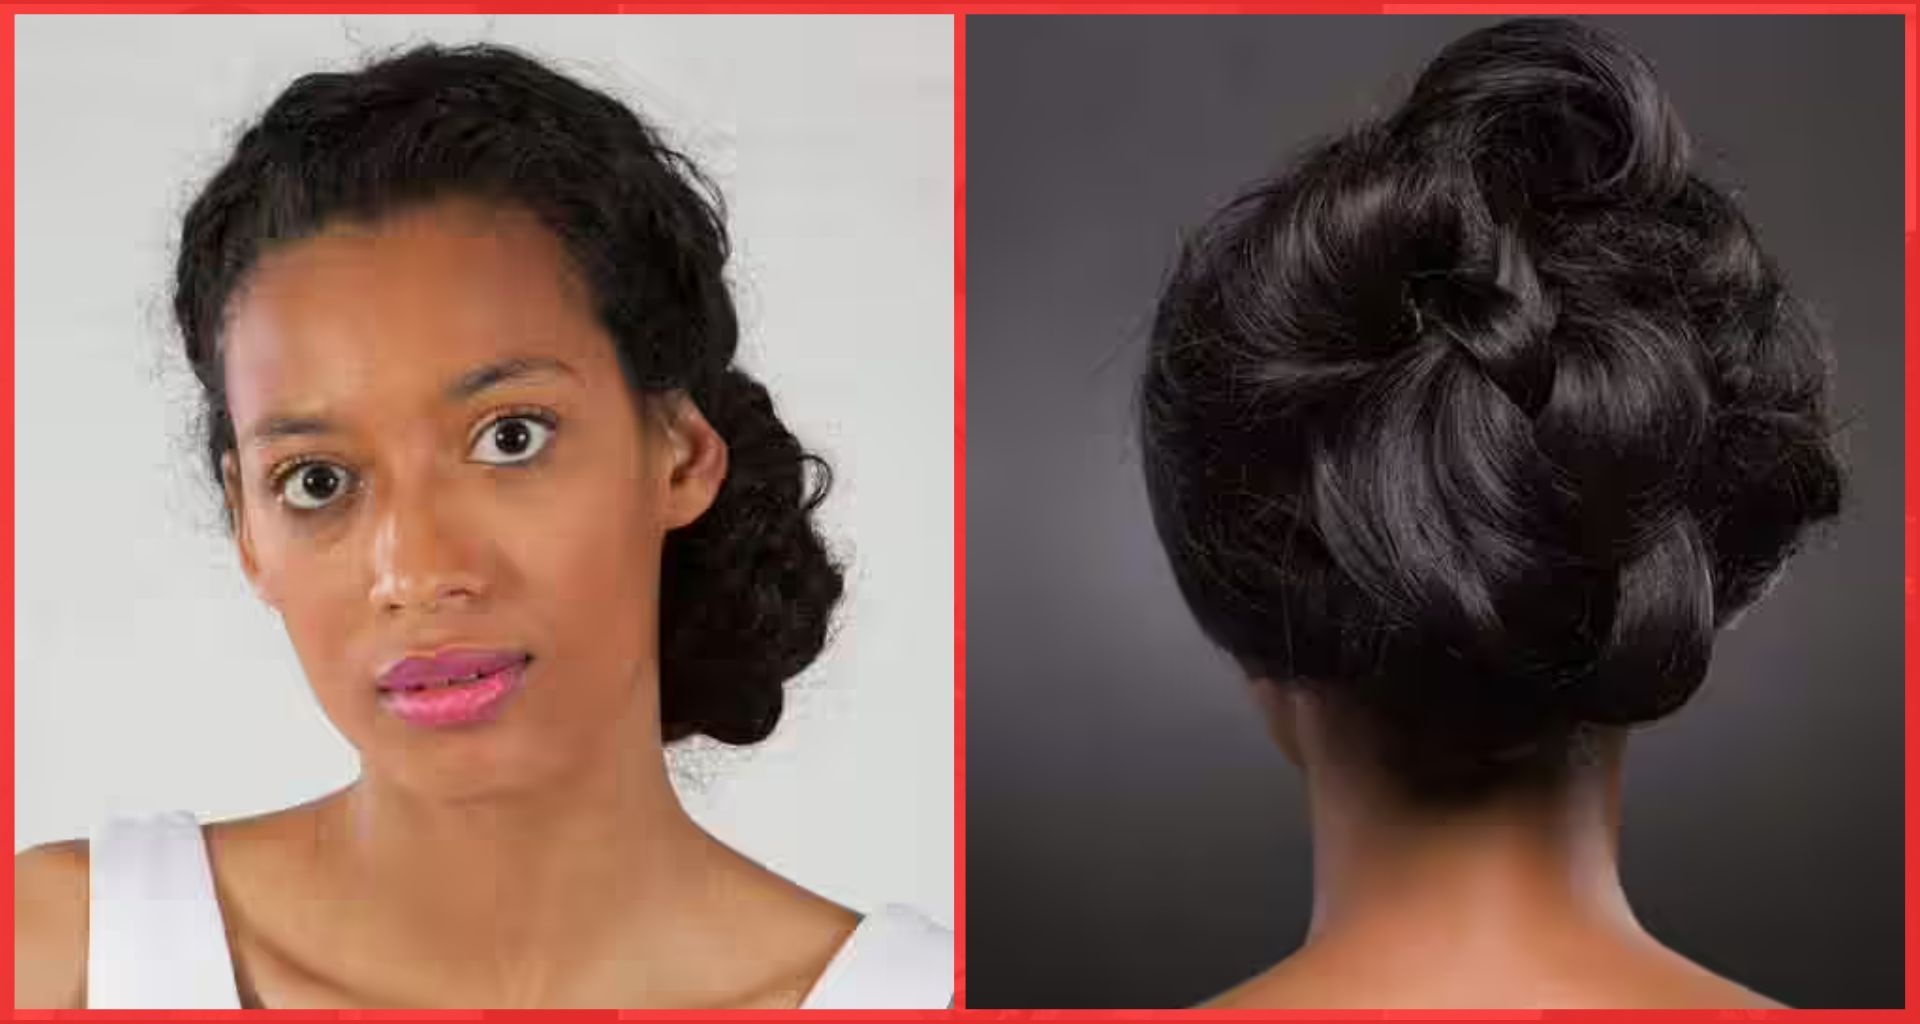
Weddings are a celebration of love, and your hairstyle should reflect your unique beauty and personality. Whether you want to embrace your natural texture, go for glamorous braids, or try something sleek and modern, these 23 wedding hairstyles are perfect for Black women. Each style is designed to enhance your natural beauty while ensuring you look and feel stunning on your special day.
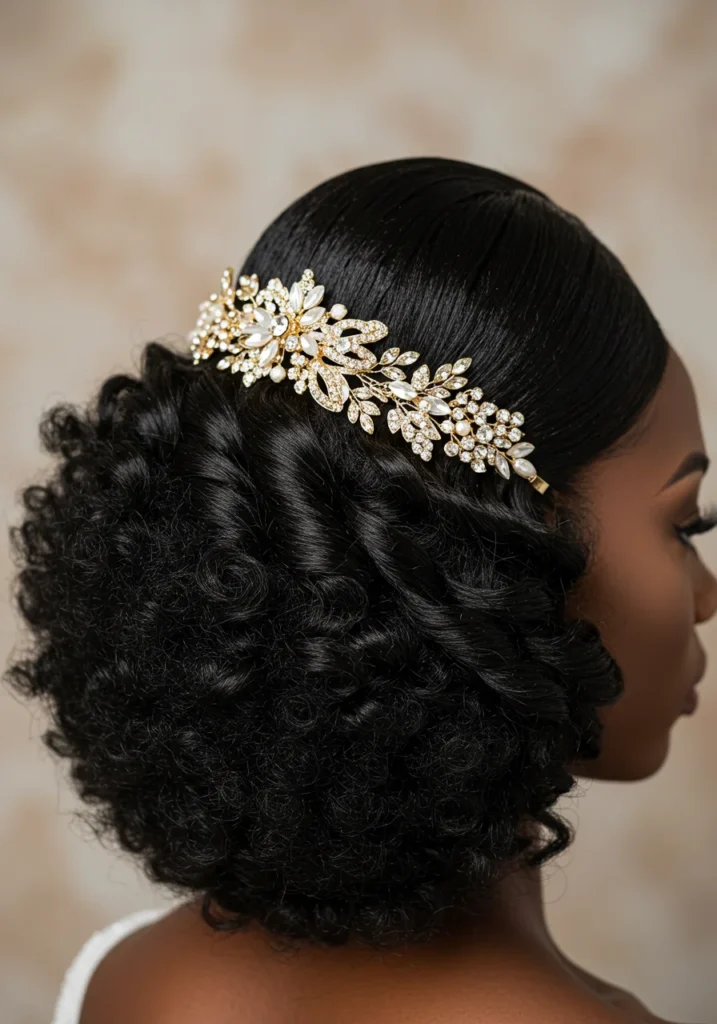
Pulled Back Afro with Headpiece
What You Need:
- Hair cream, moisturizer, or oil
- Rat-tail comb
- Thin black wire headband
- Headpiece (florals, feathers, ribbons, or gems)
- Hairpins
- Lightweight setting spray
How To Do:
- After washing and drying your afro, apply hair cream along the front edge of your hairline.
- Use a rat-tail comb to slick back the front 2 inches of hair, creating a polished crown.
- Place a thin black wire headband at the line where the slicked-back section meets the afro.
- Add your chosen headpiece, positioning it so it rests on the slicked-back portion while the afro flows behind.
- Secure everything with hairpins and finish with a lightweight setting spray for all-day hold.
Pro Tip: Match your headpiece to your bouquet by asking your florist for extra flowers like freesia, gardenia, or orchids for an elegant touch.
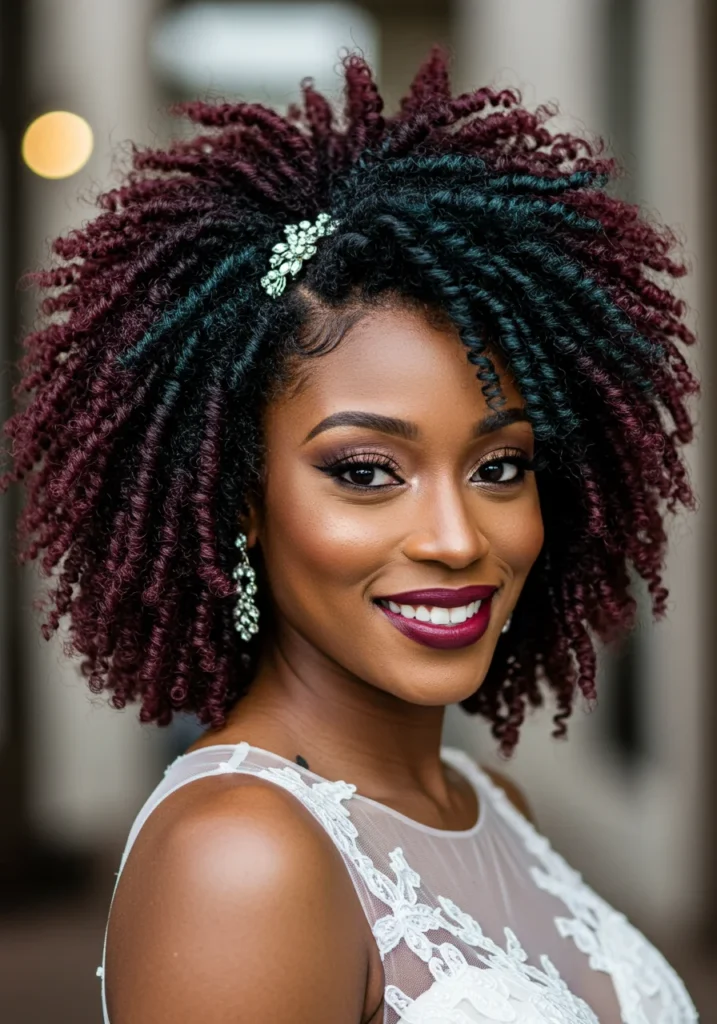
Dip-Dyed Natural Coils
What You Need:
- Detangler for curly hair
- Elastic bands
- Gloves
- Hair highlighting kit
- Applicator brush
- Mild shampoo
- Leave-in conditioner
- Conditioning spray
- Curl-defining cream
How To Do:
- Detangle your 2-3 day-old hair using a curl-friendly tool to separate strands for even color application.
- Divide your hair into 8 sections and secure each with elastic bands.
- Mix your dye solution according to the kit instructions.
- Using an applicator brush, apply the dye to the ends of each section.
- Leave the dye on as instructed, then wash it out with mild shampoo and follow up with leave-in conditioner.
- Once dry, spritz conditioning spray and apply curl-defining cream. Wrap your hair in a silk scarf overnight for defined, dip-dyed coils.
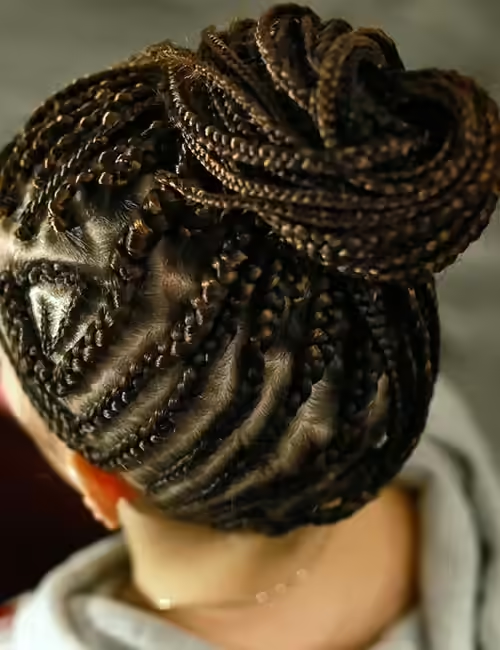
The Feed-In Braided Bun
What You Need:
- Hair cream, moisturizer, or oil
- Rat-tailed comb
- Detangling brush
- Sectioning clips
- Elastic bands or hot water (for sealing ends)
- Hairpins
How To Do:
- Wash and detangle your hair.
- Divide your hair into alternating 1 cm and 0.5 cm sections in a circular pattern, starting from the nape.
- Begin braiding a cornrow at the front, adding hair (or extensions) as you go. Stop adding hair at the center and continue braiding upwards.
- Alternate between thick and thin cornrows until all sections are braided.
- Secure the ends with elastic bands or seal them with hot water.
- Gather all braids into a bun at the crown, tucking the ends inside. Secure with hairpins and accessorize as desired.
Natural Curls
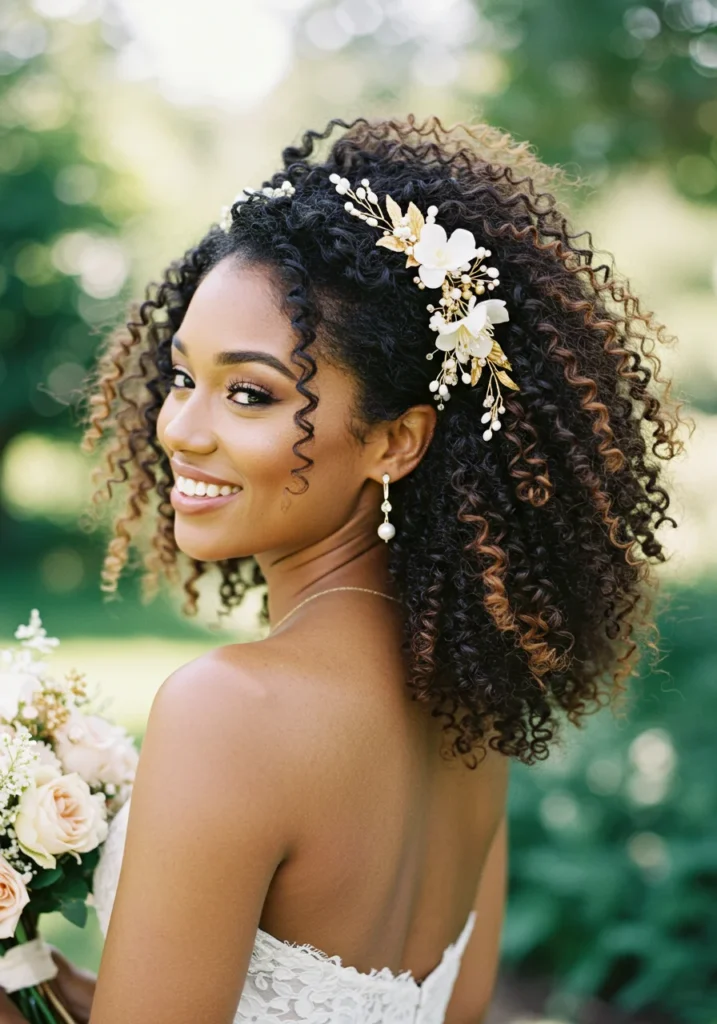
What You Need:
- Curl-defining cream
- Blow dryer
- Silk scarf
- Hair oil
- Hair extensions (optional)
How To Do:
- Microwave hair oil for a few seconds and apply it thoroughly to your hair. Leave it on for an hour.
- If needed, weave in extensions after soaking them in apple cider vinegar and water to prevent scalp irritation.
- Wash your hair, then blow-dry on a low setting.
- Apply curl-defining cream and wrap your hair in a silk scarf overnight.
- Wake up to bouncy, defined curls ready for your big day.
Traditional Black Braids
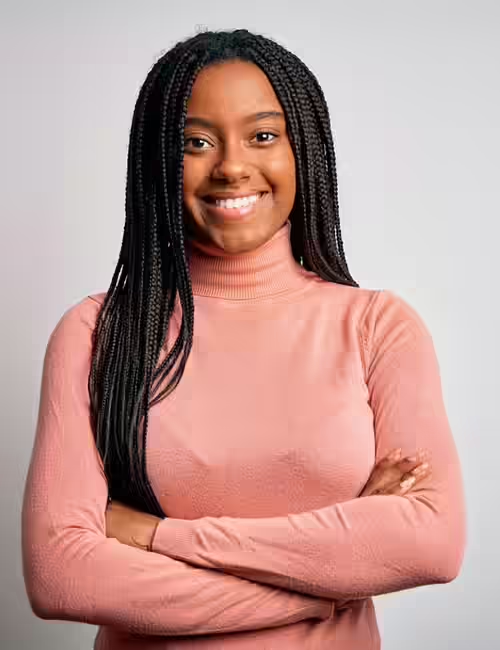
What You Need:
- Hair cream, moisturizer, or oil
- Rat-tailed comb
- Hairbrush
- Hair extensions
- Sectioning clips
- Elastic bands or hot water
How To Do:
- Wash and air-dry your hair, applying hair cream or moisturizer to soften it.
- Choose a protective style like goddess braids, tree braids, or box braids. Follow detailed instructions for your chosen style.
- Accessorize with decorative pins, beads, or clips for added flair.
Beachy Waves
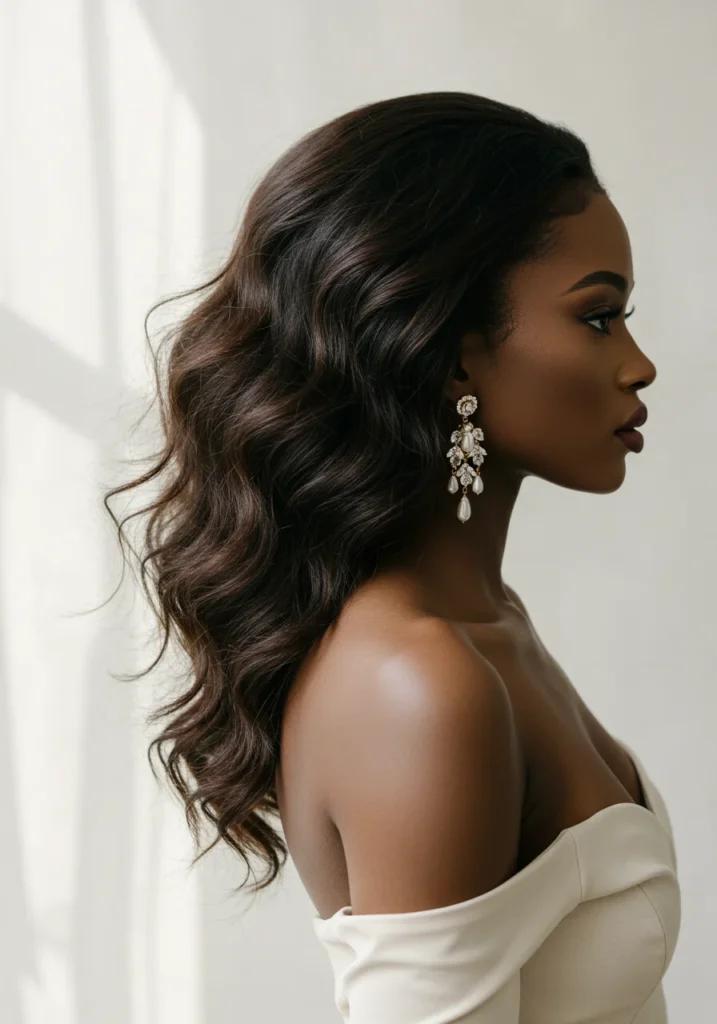
What You Need:
- Heat protectant
- Straightening iron
- Hairspray
How To Do:
- Wash and towel-dry your hair, leaving it slightly damp.
- Apply heat protectant all over.
- Take 3-inch sections of hair and wrap them around the straightening iron, pulling down gently to create waves.
- Finish with hairspray to lock in the style.
Twisted Halo
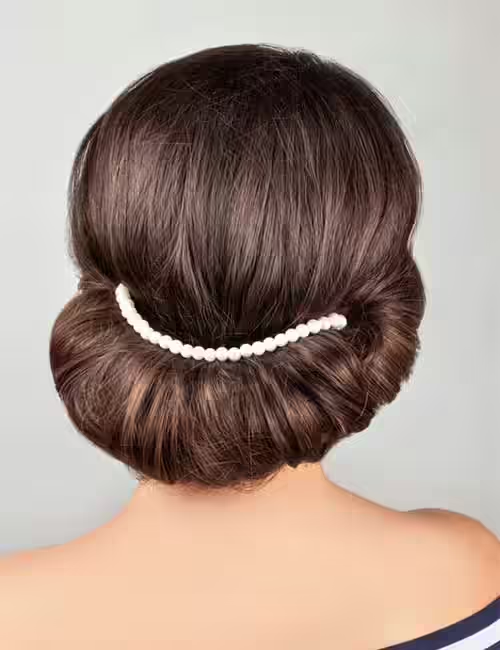
What You Need:
- Elastic headband
- Flowers (fresh or artificial)
- Hairpins
How To Do:
- Part your hair down the middle or on one side.
- Place the headband around your crown, letting your hair hang loose underneath.
- Starting from the front, twist 2-inch sections of hair and pass them over the headband, adding more hair as you go.
- Pancake the twists for volume and pin flowers into the updo for decoration.
Side-Swept Afro
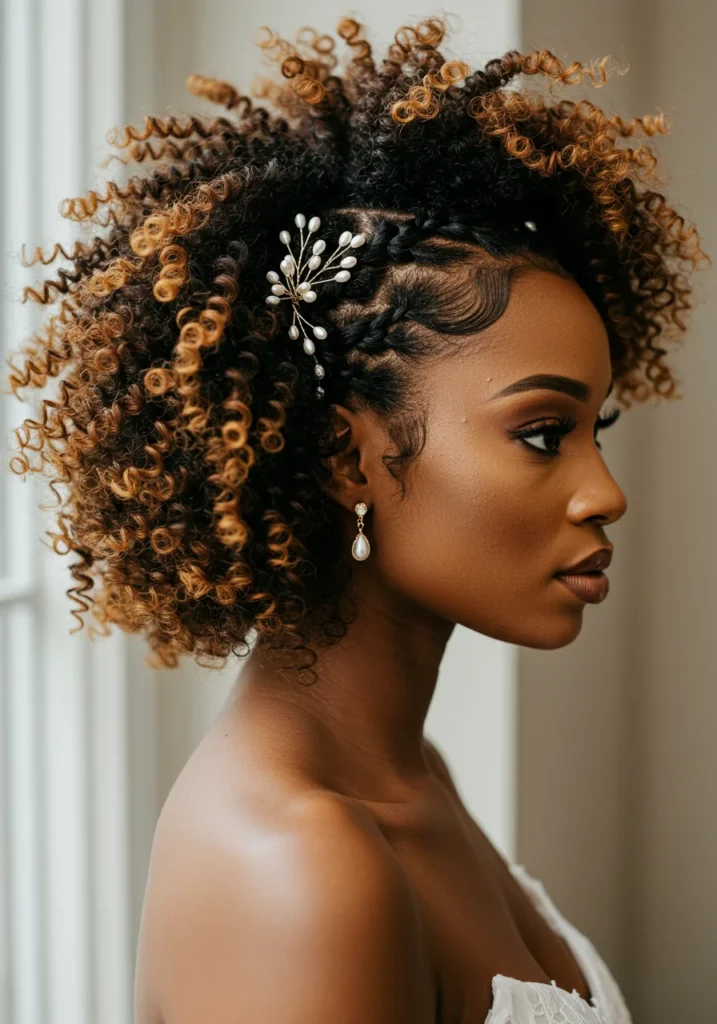
What You Need:
- Rat-tailed comb
- Brush
- Blow dryer
- Hairpins
- Hair oil
How To Do:
- Brush and blow-dry your afro, stretching it out with your fingers.
- Apply oil for shine and part your hair deeply to one side.
- Sweep all your hair to the side, pinning the opposite side neatly.
- Add delicate accessories for a bridal touch.
Elegant Messy Bun
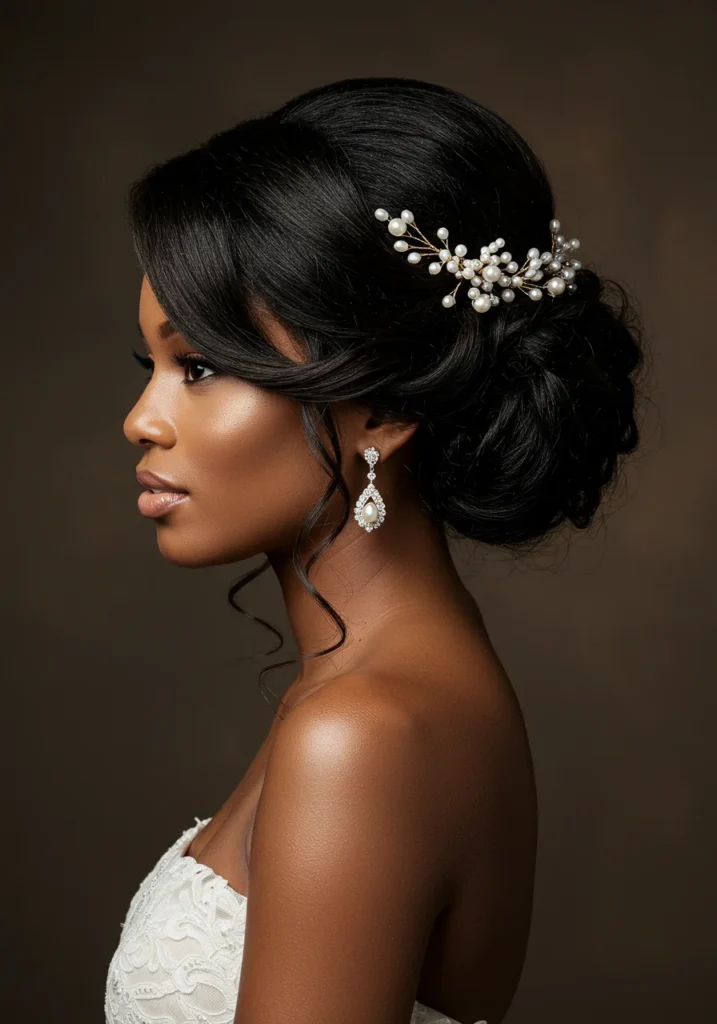
What You Need:
- Elastic band
- Hairpins
- Decorative hairpins
How To Do:
- Comb your hair back and gather it into a low bun.
- Secure with an elastic band and hairpins.
- Add decorative pins for a chic, effortless look.
Stretched-Out Hair
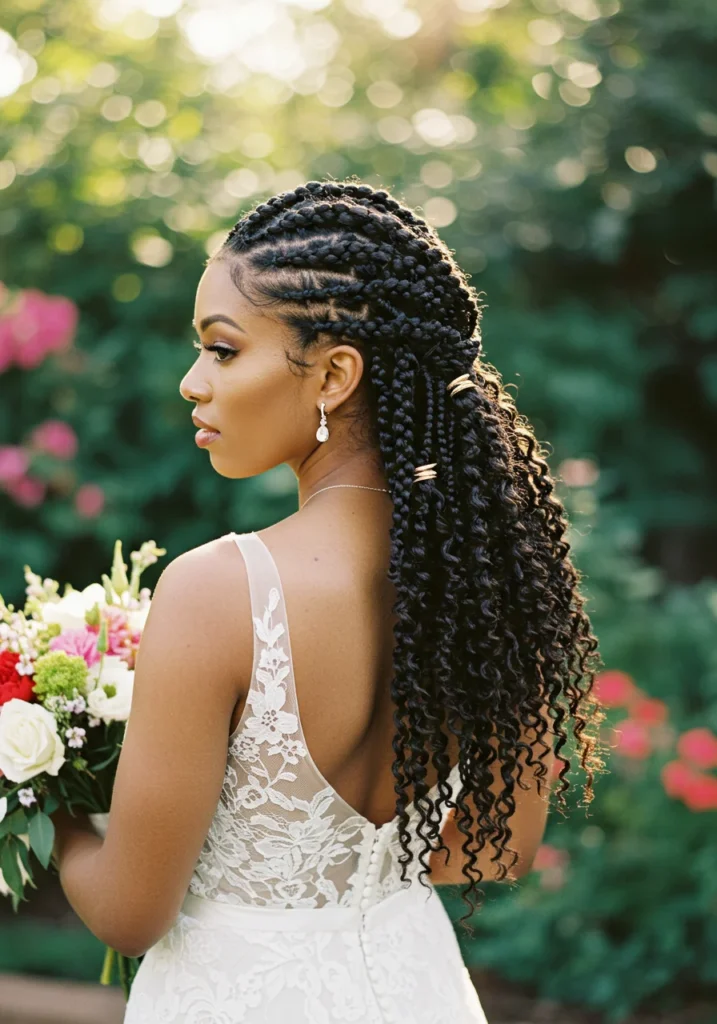
What You Need:
- Blow dryer
- Brush
- Heat protectant
- Oil
- Rat-tailed comb
- White flowers
How To Do:
- Wash and brush your hair, then apply heat protectant.
- Blow-dry your hair while stretching it out with your fingers.
- Part your hair to one side and add small white flowers for a romantic vibe.
Faux Mohawk
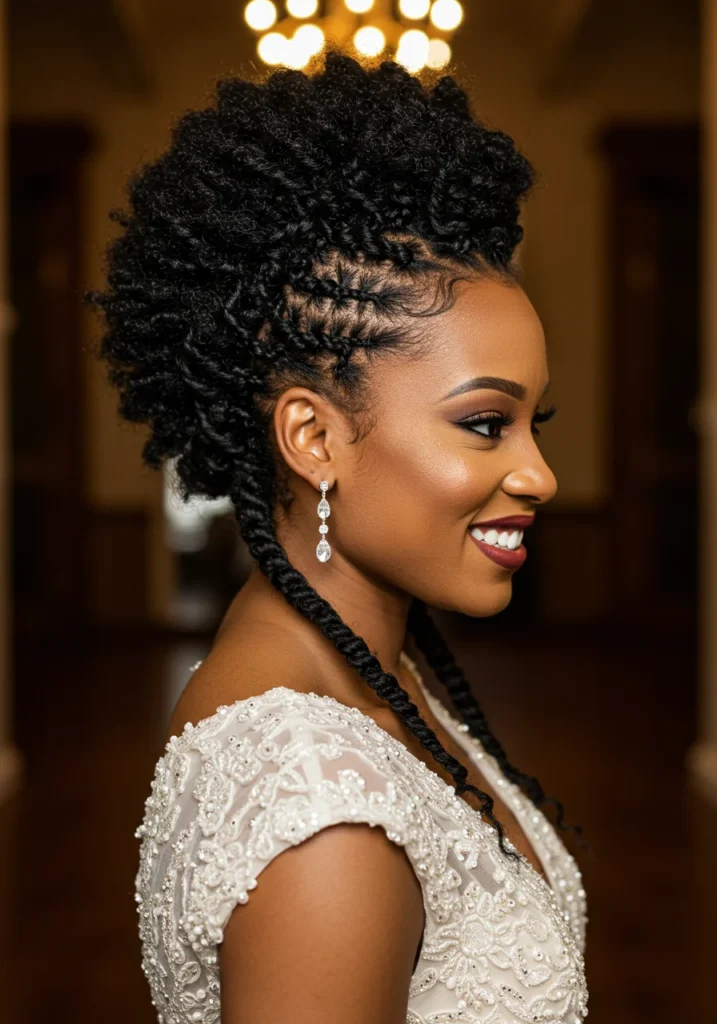
What You Need:
- Elastic bands
- Rat-tailed comb
- Hairpins
- A string of pearls or beads
How To Do:
- Start by dividing your hair into four sections using a rat-tailed comb: one top section, two middle sections, and one bottom section.
- Comb all your hair toward the center and tie each section into a ponytail, leaving some hair loose on the sides (except at the top and bottom). This will create four central ponytails.
- Apply hair cream to the loose sections of hair and braid them into thin cornrows, starting from the hairline and moving toward the ponytails.
- Pin the cornrows under the ponytails to keep them secure.
- Use hairpins to connect all the ponytails, forming a faux mohawk.
- Accessorize the faux mohawk with a string of pearls or beads for an elegant touch.
Pro Tip: The term “faux” in faux mohawk is French for “false.” This style is also known as a fauxhawk or Hoxton fin.
Blow-Dry Straight Hair
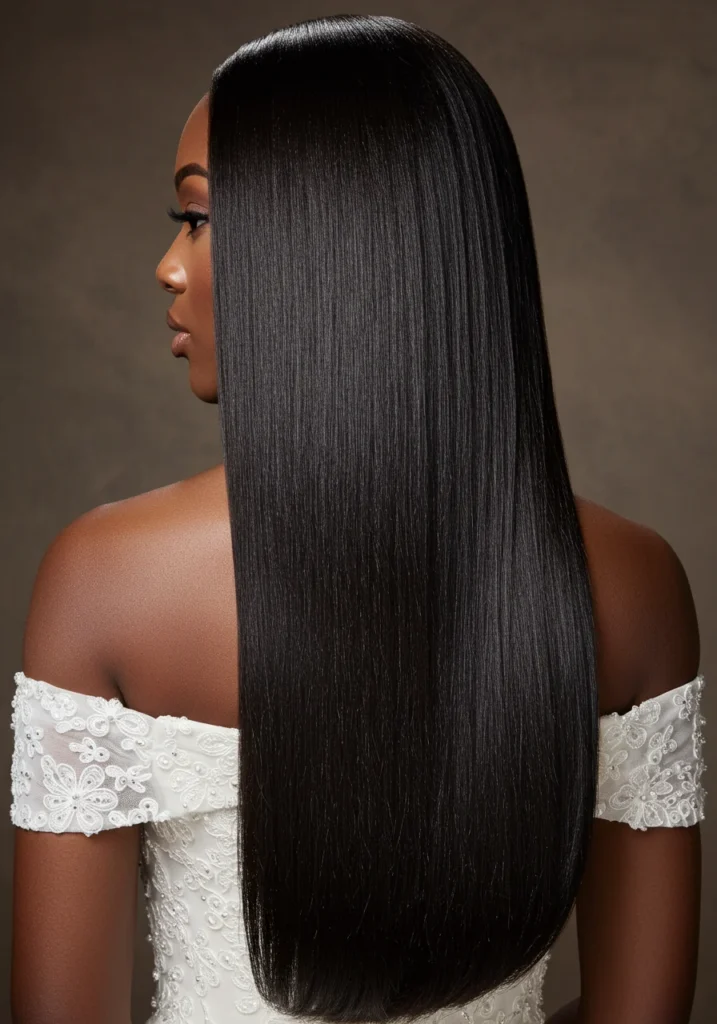
What You Need:
- Leave-in conditioner
- Hairbrush
- Blow dryer
- Heat protectant
- Silk press straightener
How To Do:
- Wash your hair and let it air-dry partially until it’s damp but not wet.
- Apply leave-in conditioner to detangle and moisturize your hair.
- Brush your hair downward while blow-drying it. Hold the hair at the ends with the brush for a few seconds to stretch and straighten it.
- Once your hair is mostly dry, apply a heat protectant to shield it from further damage.
- Use a silk press straightener to achieve sleek, smooth results. For added shine, finish with a smoothing serum.
The Half Top Knot
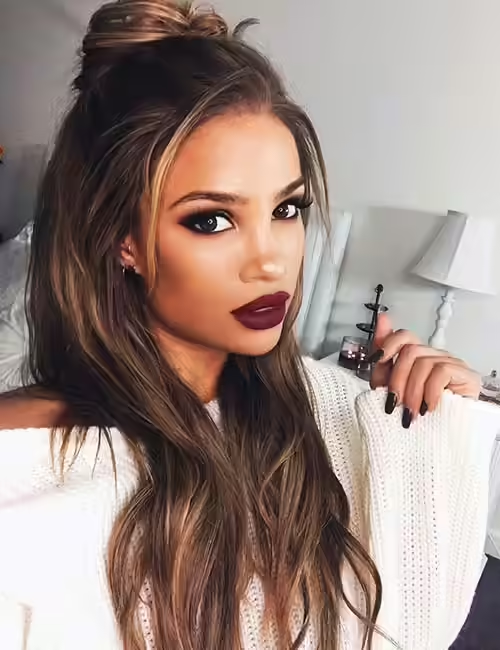
What You Need:
- Comb
- Elastic band
- Hairpins
- Hair accessories like small beads or flowers
How To Do:
- Begin by straightening your hair for a polished look.
- Comb through your hair to remove any knots or tangles.
- Gather hair from the top of your head as if creating a half ponytail.
- Wrap an elastic band around the ponytail, twisting it halfway to create a base for the top knot.
- Loosely wrap the remaining ponytail around the base and secure it with hairpins.
- Comb the rest of your hair neatly and pull out a few strands in the front to frame your face.
- Accessorize the top knot with small beads, flowers, or hair rings for a chic bridal look.
Fun Fact: Celebrities like Kendall Jenner, Gigi Hadid, Kate Mara, and Sonakshi Sinha have rocked the half-top knot hairstyle.
The Messy Braid
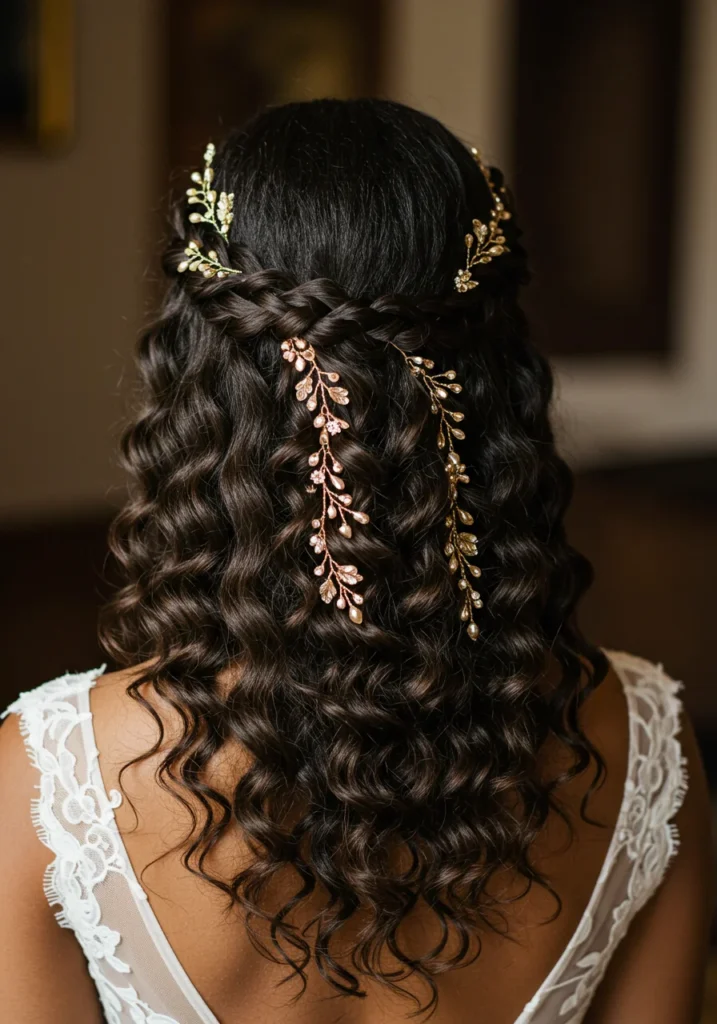
What You Need:
- Comb
- Thin elastic band
How To Do:
- Straighten your hair before starting this style.
- Part your hair naturally and sweep all your hair to one side.
- Begin braiding your hair in a loose three-strand braid. For a fancier look, try a fishtail or four-strand braid.
- Allow the ends of your hair to stick out slightly for a messy, boho vibe.
- Secure the braid with a thin elastic band that matches your hair color.
- Pancake the braid by gently pulling apart the edges to add volume and texture. Let a few strands fall around your face for a soft, romantic look.
Tapered Pixie Bob
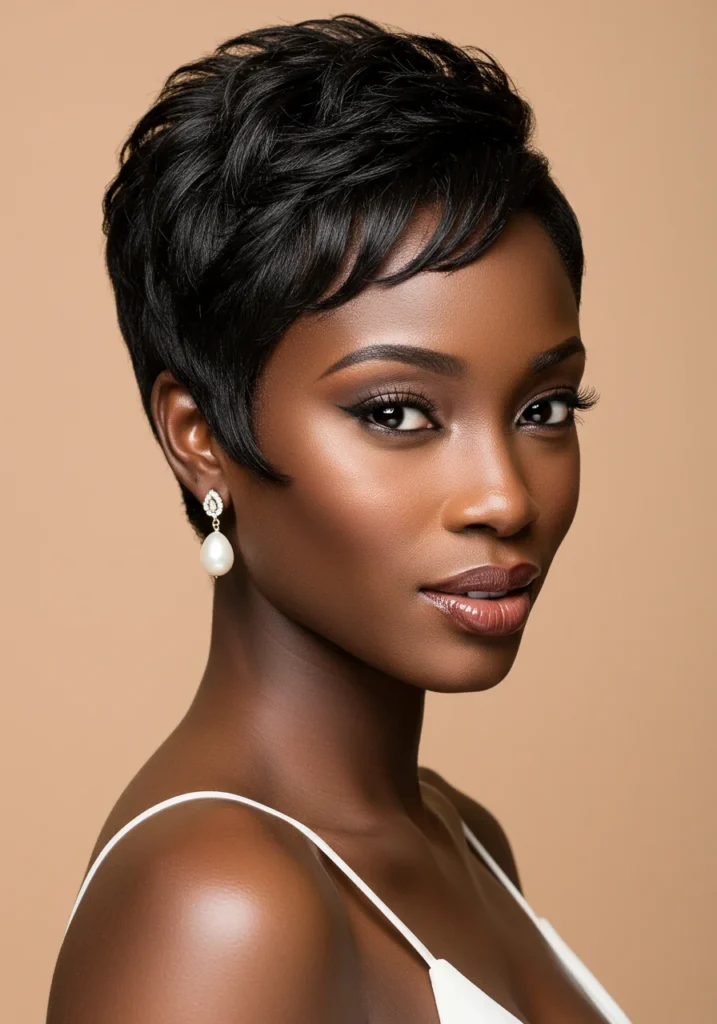
What You Need:
- Round brush
- Blow dryer
- Hairspray
How To Do:
- Start with damp hair and part it on one side.
- Blow-dry your hair while brushing it backward with a round brush for volume.
- Lift your bangs with the round brush and then drop them while blow-drying to create a swoop effect.
- Finish with hairspray to set the style in place.
Slicked-Back Ponytail
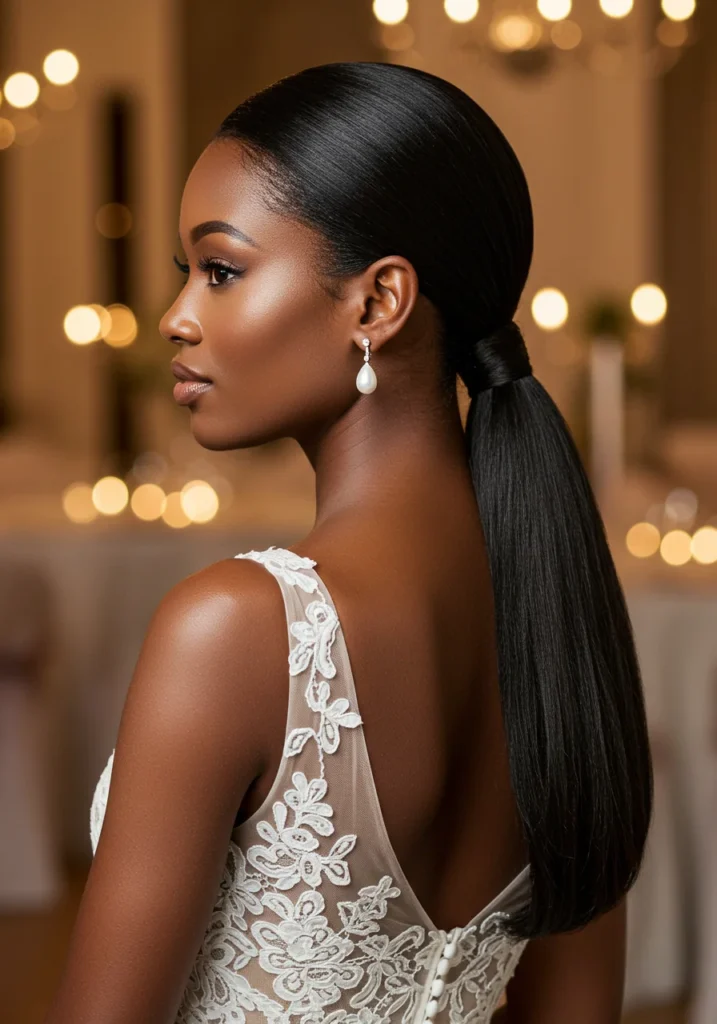
What You Need:
- Heat protectant
- Silk press straightener
- Elastic band
- Comb
How To Do:
- Apply heat protectant and use a silk press straightener to smooth your hair.
- Comb your hair to remove tangles and part it in a deep side part.
- Gather all your hair into a low ponytail at the back and secure it with an elastic band.
Spiked Pixie Hairdo
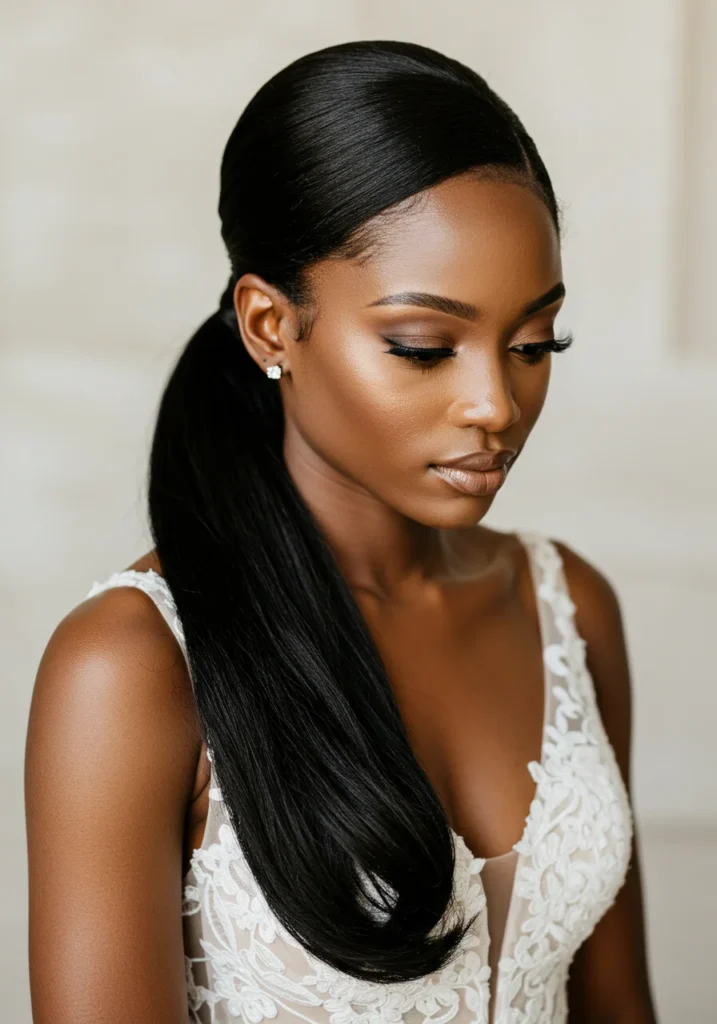
What You Need:
- Comb
- Round brush
- Strong-hold hair gel
How To Do:
- Wash and blow-dry your hair.
- Apply strong-hold hair gel evenly to cover every strand and ensure the style stays intact throughout the day.
- Place the round brush behind a section of hair and comb it upward and backward. Repeat this motion across your entire head to achieve a spiked look.
One-Side Swept Curls
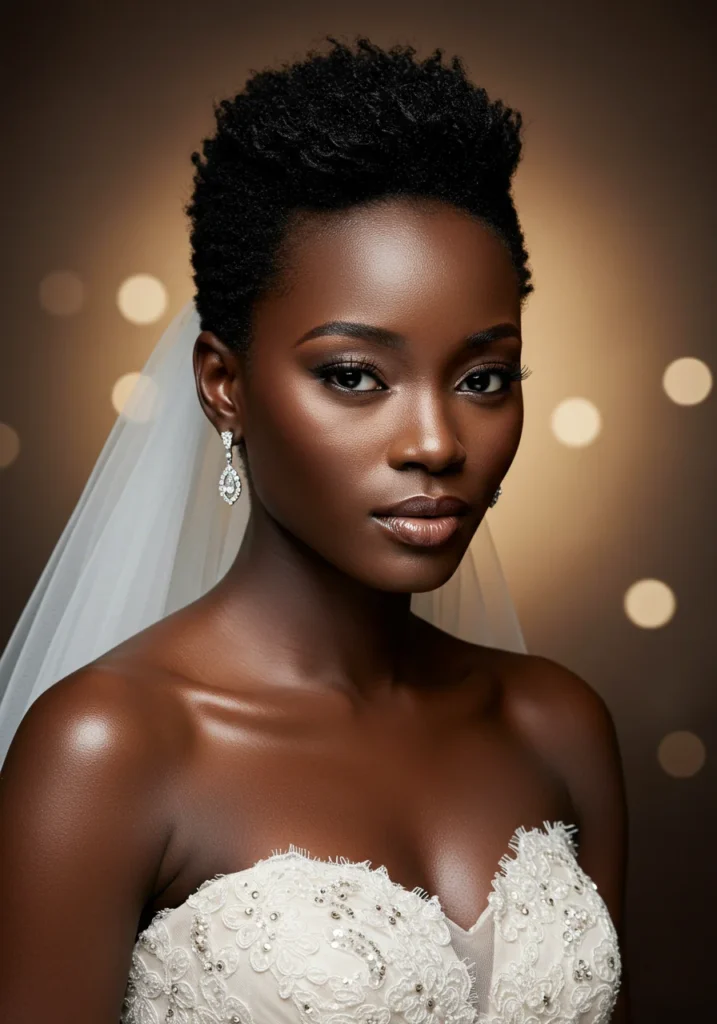
What You Need:
- Heat protectant
- Curling iron
- Hairspray
How To Do:
- Spritz heat protectant all over your hair.
- Use a curling iron to curl your hair from the mid-lengths to the ends, wrapping large sections for big, bouncy curls.
- Lightly spritz hairspray to hold the curls in place.
- Part your hair deeply on one side and sweep all your hair to the opposite side, pinning it behind your ear.
Criss-Cross Bun
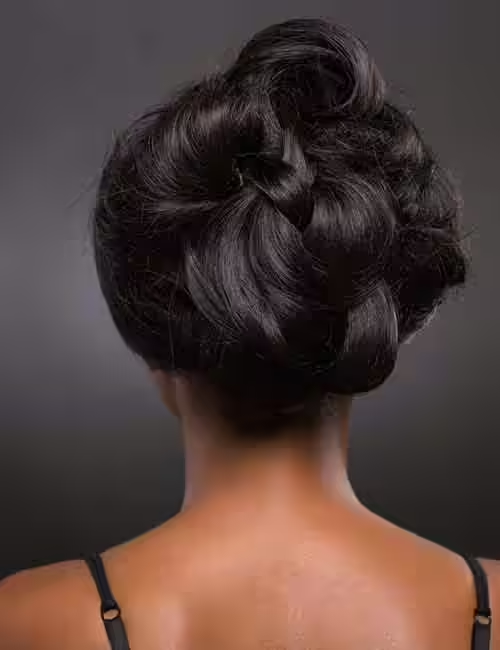
What You Need:
- Hairpins
- Braiding hair clip
- Comb
- Accessories of your choice
How To Do:
- Comb and detangle your hair thoroughly.
- Comb the front section of your hair backward and push it forward slightly to create a pouf. Secure it with hairpins.
- Divide the rest of your hair into two equal sections.
- Insert a braiding hair clip between the two sections.
- Take a section of hair from one side, pass it through the opposite loop of the clip, and bring it back to its original side. Repeat with the other side.
- Continue adding hair to the sections as you criss-cross them until you reach the end of the clip.
- Tuck the remaining hair into a bun and pancake it for volume.
- Accessorize with an elegant comb or decorative pins.
Low Braided Updo
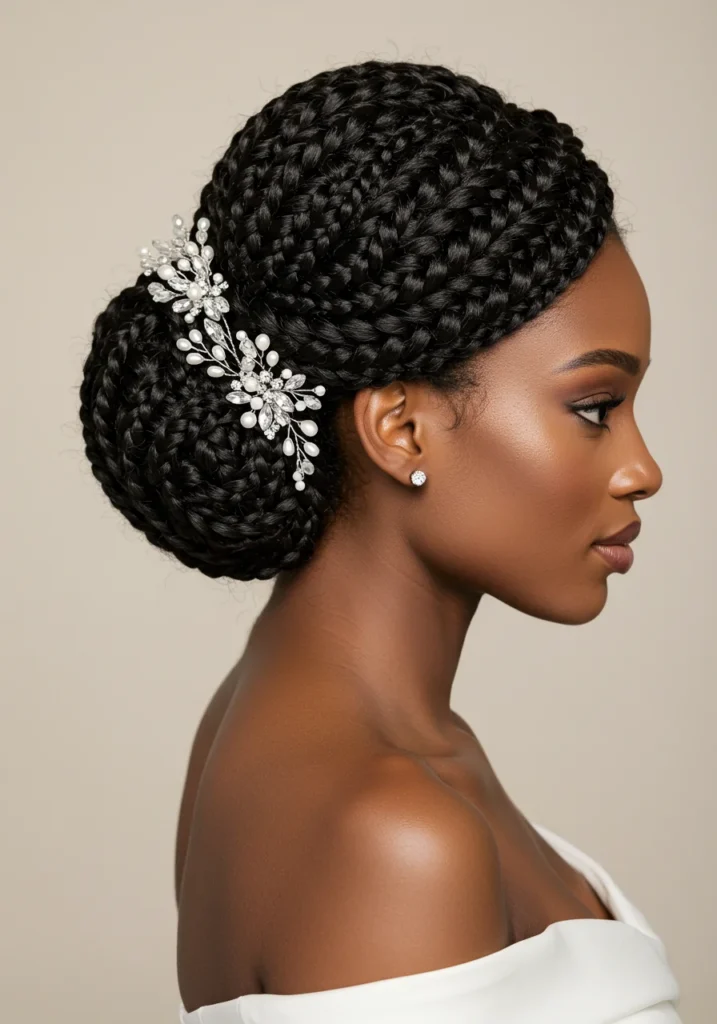
What You Need:
- Hairpins
- Comb
- Curling iron
- Hairspray
- Optional accessories
How To Do:
- Slick back all your hair using a comb. Part it on one side and pin up your bangs.
- Pick up a section of hair and weave it into a loose, irregular braid that goes sideways across the front of your head. Secure it with bobby pins.
- Wrap the rest of your hair around the braid to form a low bun.
- Pin the ends of the braid within the bun or wrap the braid around the bun if it’s long enough.
- Add optional decorative pins and finish with hairspray to set the style.
Kinky Pineapple Ponytail
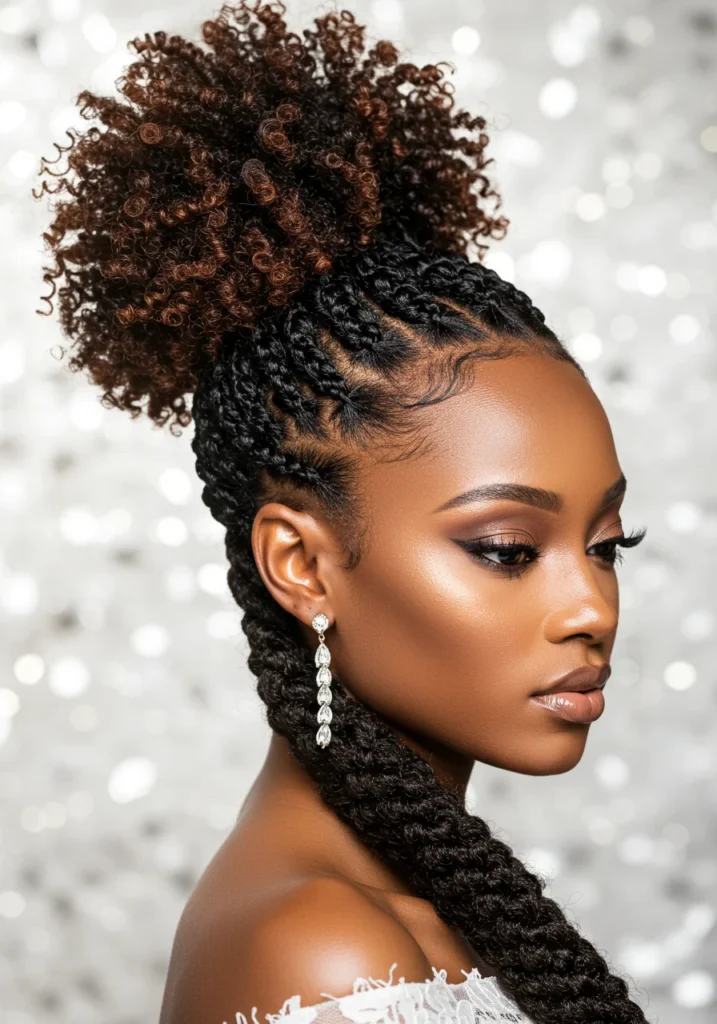
Kinky Pineapple Ponytail Wedding Hairstyle for Black Women
What You Need:
- Curl-defining cream
- Elastic band
- Silk scarf
How To Do:
- Prep Your Hair: Wash your hair the day before your wedding to ensure it’s clean and ready for styling.
- Enhance Curls Overnight: Apply a generous amount of curl-defining cream to damp or dry hair, ensuring even coverage. Wrap your hair in a silk scarf to lock in moisture and enhance curl definition while you sleep.
- Unveil Defined Curls: In the morning, remove the silk scarf to reveal beautifully defined curls.
- Gather Your Hair: Bend forward and brush all your hair toward the center of your head, gathering it at the crown.
- Secure the Ponytail: Use an elastic band to tie your hair at the crown, creating a high ponytail.
- Fluff and Finish: Stand upright and gently fluff your ponytail to add volume and texture, completing the look with a playful yet elegant vibe.
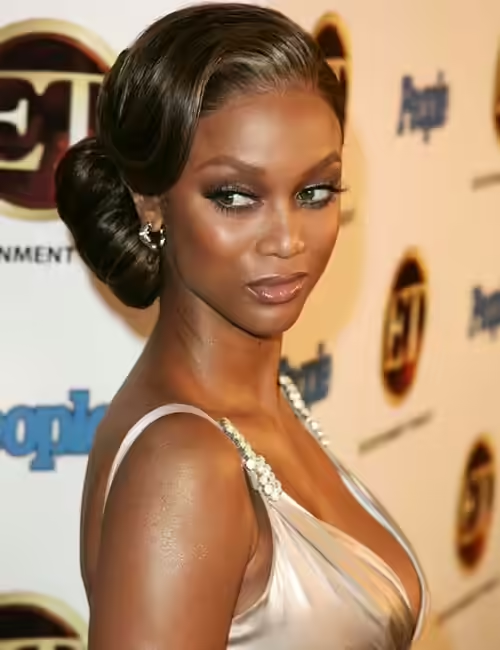
Hollywood French Twist
Hollywood French Twist Wedding Hairstyle for Black Women
What You Need:
- Hairpins
- Straightening iron
- Heat protectant
- Volumizing spray
- Long hair clip
- Blow dryer
- Round brush
- Comb
How To Do:
- Straighten Your Hair (If Needed): If you have curly hair, begin by applying heat protectant and straightening it for a sleek base.
- Create a Polished Look: Once your hair is straightened, comb it thoroughly to remove tangles. Part your hair on one side and clip up your bangs. If you don’t have bangs, take a small section of hair from the side with more volume, bend it near your forehead, and pin it to one side for a chic swoop.
- Prepare for the Twist: Gather the remaining hair at the back and pull it to either the right or left side.
- Roll Your Hair: Roll your hair inward toward your head. To keep the twist neat, place a long hair clip at the end of your hair and roll it upward. Ensure the clip is discreet and doesn’t show through the twist.
- Secure the Style: Once your hair is fully rolled, secure it with hairpins to keep the twist in place.
- Style the Front Section: Unclip your bangs or the front section of hair. Using a round brush and blow dryer, style this section into a smooth, elegant swoop.
- Lock It In: Finish with a spritz of hairspray to ensure the Hollywood French twist stays flawless throughout the day.
Loose Wave Hairstyle
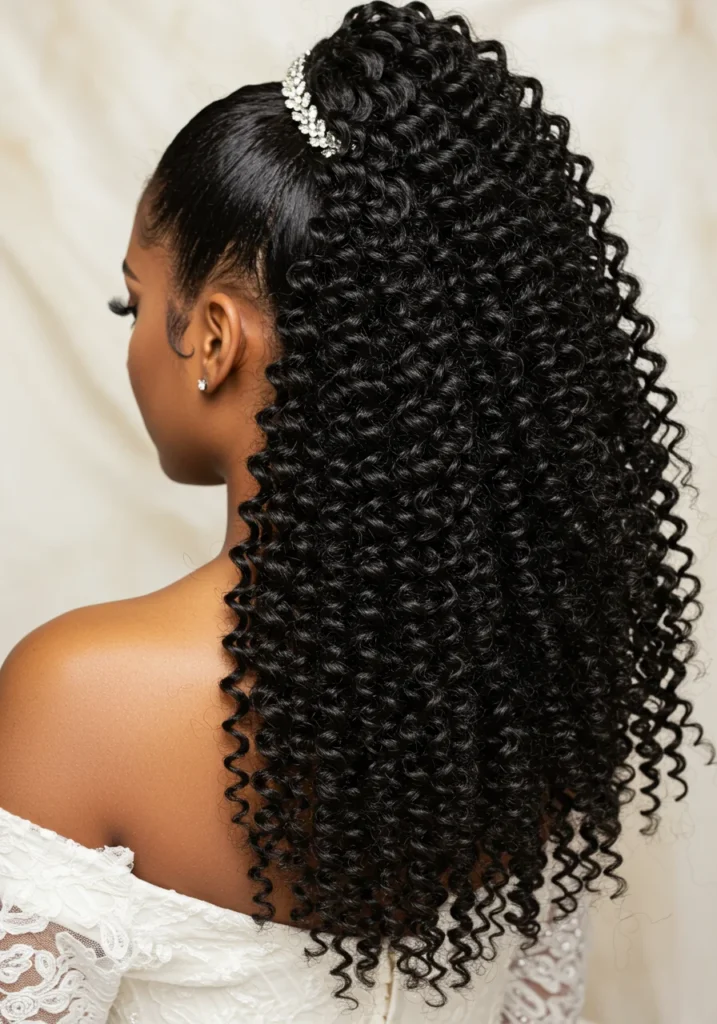
Loose Wave Wedding Hairstyle for Black Women
Image: Shutterstock
What You Need:
- Heat protectant
- Curling iron or hair straightener
- Hair serum
- Decorative wedding hair band
How To Do:
- Start with Straight Hair: This hairstyle works best on straightened or relaxed African hair. Begin by applying heat protectant to shield your strands from damage.
- Straighten Fully (Optional): If your hair isn’t already straight, use a flat iron to smooth it out completely.
- Create Loose Waves: Using a curling iron, curl sections of your hair starting from the mid-lengths to the ends. Wrap medium-sized sections around the barrel and hold for 3-4 seconds to achieve soft, bouncy waves. Allow the curls to cool in your hands before releasing them for a natural finish.
- Add Shine: Apply a lightweight hair serum to the waves to enhance shine and give your hair a polished, healthy look.
- Part and Style: Create an off-centered part at the hairline and comb the front section toward the side for a sophisticated touch.
- Set the Look: Mist your hair with hairspray to lock in the style and prevent frizz.
- Accessorize: Complete the look by adding a decorative wedding hair band for an extra touch of elegance.
Personal Experience Tip:
Blake Jael, a YouTuber, shared her experience styling her hair for her wedding day. She mentioned, “I’m going to wear it straight today, and tomorrow I’m going to add curls.” Reflecting on the condition of her hair, she added, “It feels a little heavy but also doesn’t feel dry—it feels great!
Key Takeaways
- Wedding hairstyles featuring knots, braids, and twists are timeless and versatile options for Black women.
- Embrace your natural texture with styles like afros, curls, or protective braids.
- For sleek looks, consider relaxed hair styled in beachy waves or straightened finishes.
Wedding Hairstyling Tips for Black Women
- Hydration Is Key: Start with a hydrating leave-in conditioner or oil to keep your hair healthy and moisturized throughout the day.
- Choose the Right Style: Pick a hairstyle that complements your hair type and aligns with your wedding theme.
- Protective Styles: Opt for protective styles like braids or twists, which can be adorned with accessories for a stunning look.
- Set with Quality Products: Use strong-hold gels or sprays designed for textured hair to maintain your style and prevent frizz.
- Use Heat Protectant: Always use a high-quality heat protectant before styling to prevent damage and ensure long-lasting results.
These tips and styles will help you create a breathtaking wedding hairstyle that highlights your natural beauty and makes you feel confident on your special day!
