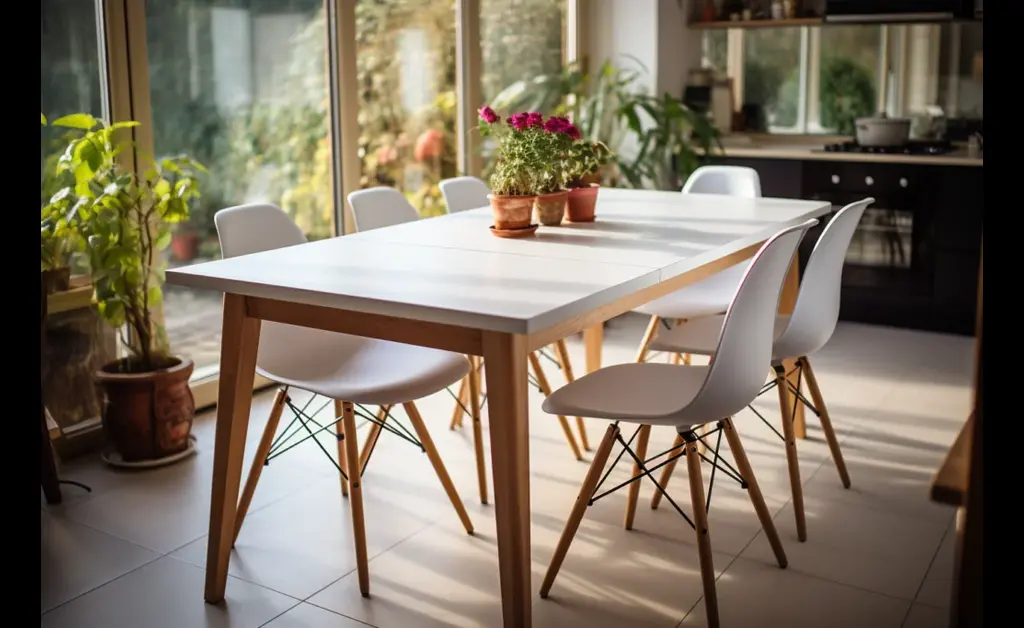
There’s something undeniably charming about farmhouse-style decor. It evokes a sense of warmth, simplicity, and rustic charm that instantly makes a space feel inviting and cozy. However, achieving that coveted farmhouse aesthetic can often come with a hefty price tag, especially when it comes to furniture pieces. Fear not, my friends! You don’t need to break the bank to bring that bucolic vibe into your home. With a little creativity, some elbow grease, and a few inexpensive materials, you can craft your own stunning farmhouse furniture right in the comfort of your own space.
In this blog post, we’ll explore 10 cheap and easy DIY farmhouse furniture ideas that will transform your living area into a rustic haven without emptying your wallet. From repurposing old doors into coffee tables to creating charming wall shelves from reclaimed wood, we’ve got you covered. So, roll up your sleeves, gather your tools, and get ready to unleash your inner DIY goddess or god!
What is Farmhouse Furniture?
Before we dive into the DIY goodness, let’s quickly define what we mean by “farmhouse furniture.” Farmhouse furniture is characterized by its rustic, vintage-inspired aesthetic that often incorporates repurposed or distressed materials. Think rough-hewn wood, wrought iron accents, and a mix of weathered textures and finishes that exude a sense of warmth and history.
The farmhouse style has skyrocketed in popularity in recent years, with more and more people seeking to infuse their homes with that cozy, lived-in vibe. And what’s not to love? Farmhouse furniture pieces not only add character and charm to a space but also often come with a delightful backstory, making them truly unique and one-of-a-kind.
Benefits of DIY Farmhouse Furniture
Now, you might be wondering, “Why should I bother with DIY furniture when I could just buy some ready-made pieces?” Well, my friends, the benefits of crafting your own farmhouse furniture are manifold:
- Cost-effective: By re-purposing materials and doing the work yourself, you can save a significant amount of money compared to purchasing expensive, mass-produced furniture.
- Customizable: When you DIY, you have complete control over the design, materials, and finishes, allowing you to create pieces that are truly tailored to your unique taste and space.
- Environmentally friendly: Up cycling and re-purposing materials not only saves you money but also reduces waste and gives new life to items that might otherwise end up in a landfill.
- Sense of pride and accomplishment: There’s something incredibly satisfying about being able to look around your home and admire the furniture pieces you created with your own two hands. It’s a feeling of accomplishment that simply can’t be matched by store-bought items.
10 Cheap and Easy DIY Farmhouse Furniture Ideas
Now, let’s dive into the good stuff – the DIY farmhouse furniture projects themselves! For each idea, we’ll provide an overview, a list of materials needed, step-by-step instructions, and approximate cost estimates to help you get started.
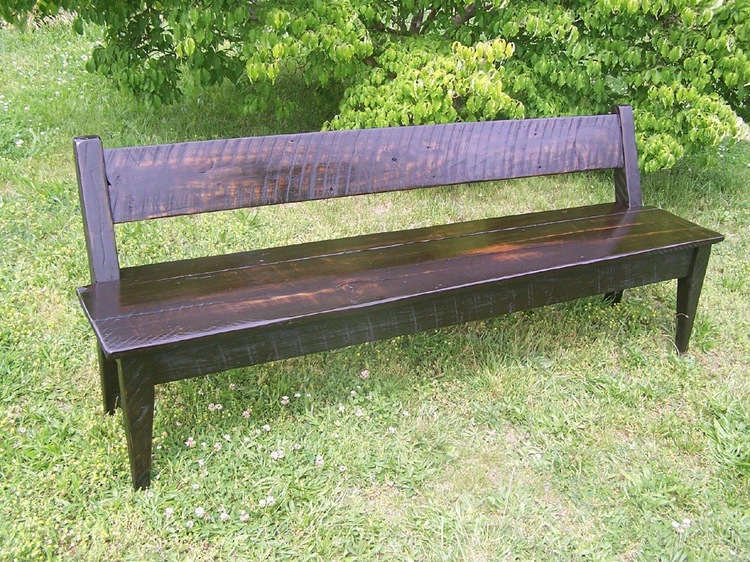
1. Farmhouse Bench from Old Wood
Overview: Transform salvaged wood boards or pallets into a charming and sturdy farmhouse-style bench that can serve as a cozy seating option or a functional entryway piece.
Materials Needed:
- Reclaimed wood boards or pallets
- Wood stain or paint (optional)
- Sandpaper
- Wood glue
- Screws or nails
- Saw (if cutting boards to size)
Estimated Cost: $20-$40, depending on the source of the wood and any additional supplies needed.
Instructions:
- Gather your reclaimed wood boards or disassemble pallets, ensuring they’re clean and free of debris.
- If necessary, use a saw to cut the boards to your desired length for the bench seat and legs.
- Sand the boards to smooth out any rough surfaces.
- Arrange the boards for the bench seat and legs, and secure them together using wood glue and screws or nails.
- (Optional) Apply a coat of wood stain or paint to achieve your desired finish.
- Let the bench dry completely before use.
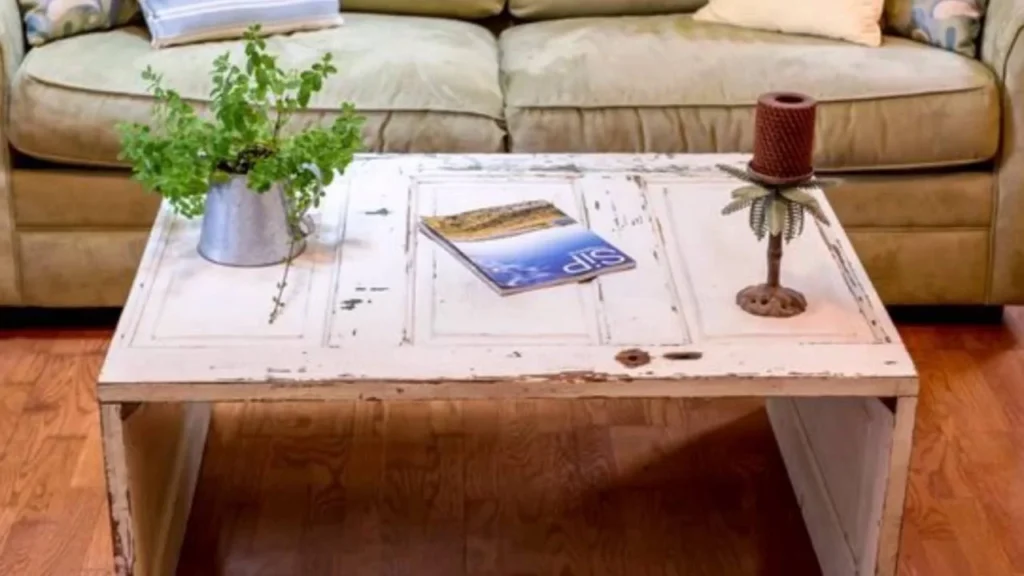
2. Repurposed Door Coffee Table
Overview: Give new life to an old door by transforming it into a rustic, one-of-a-kind coffee table that will undoubtedly become the focal point of your living room.
Materials Needed:
- An old door (solid wood or with decorative panels)
- Hairpin legs or other table legs
- Sandpaper
- Wood stain or paint (optional)
- Polyurethane or clear sealer (optional)
Estimated Cost: $30-$60, depending on the source of the door and legs.
Instructions:
- Find an old door with character – perhaps one with decorative panels or a distressed finish.
- Remove any hardware from the door, such as hinges or knobs.
- Sand the door thoroughly to prepare it for finishing.
- (Optional) Apply a coat of wood stain or paint to achieve your desired color or distressed look.
- Attach the hairpin legs or other table legs to the underside of the door, ensuring they’re level and secure.
- (Optional) Apply a clear polyurethane or sealer to protect the surface.
- Style your new coffee table with books, candles, or other farmhouse-inspired decor.
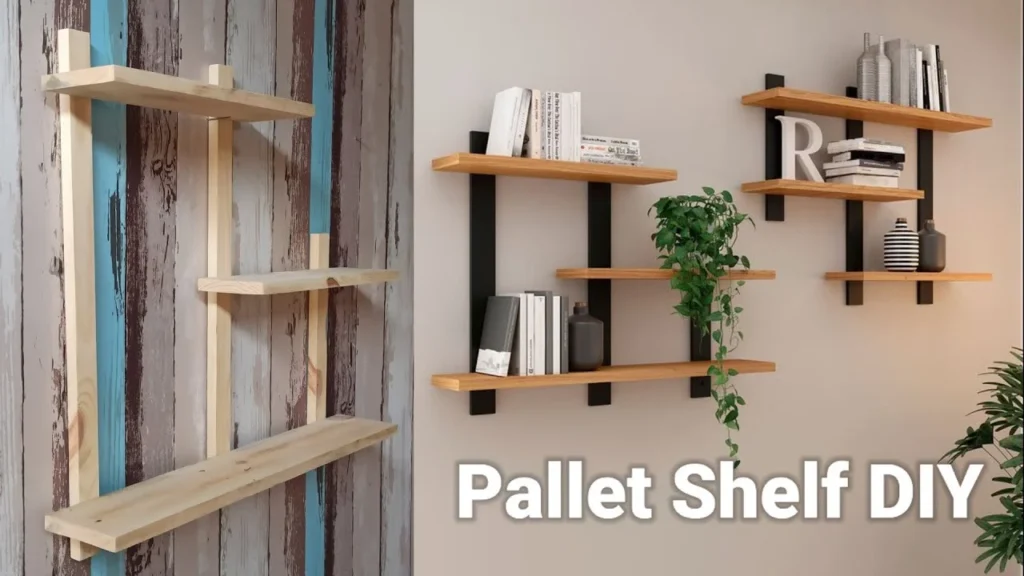
3. Pallet Wood Wall Shelf/Bookcase
Overview: Recycle old wooden pallets into a stunning and practical wall shelf or bookcase that perfectly showcases your farmhouse style while providing ample storage space.
Materials Needed:
- Wooden pallets
- Sandpaper
- Wood stain or paint (optional)
- Polyurethane or clear sealer (optional)
- Screws or nails
- Wall anchors (if needed)
Estimated Cost: $10-$30, depending on the source of the pallets and any additional supplies needed.
Instructions:
- Disassemble the wooden pallets, separating the individual boards.
- Sand the boards to remove any rough edges or splinters.
- (Optional) Apply a coat of wood stain or paint to achieve your desired finish.
- Arrange the boards in your desired configuration for the wall shelf or bookcase, securing them together with screws or nails.
- (Optional) Apply a clear polyurethane or sealer to protect the surface.
- Securely mount the shelf or bookcase to the wall using appropriate wall anchors, if needed.
- Style your new shelf with books, plants, or other farmhouse-inspired decor items.
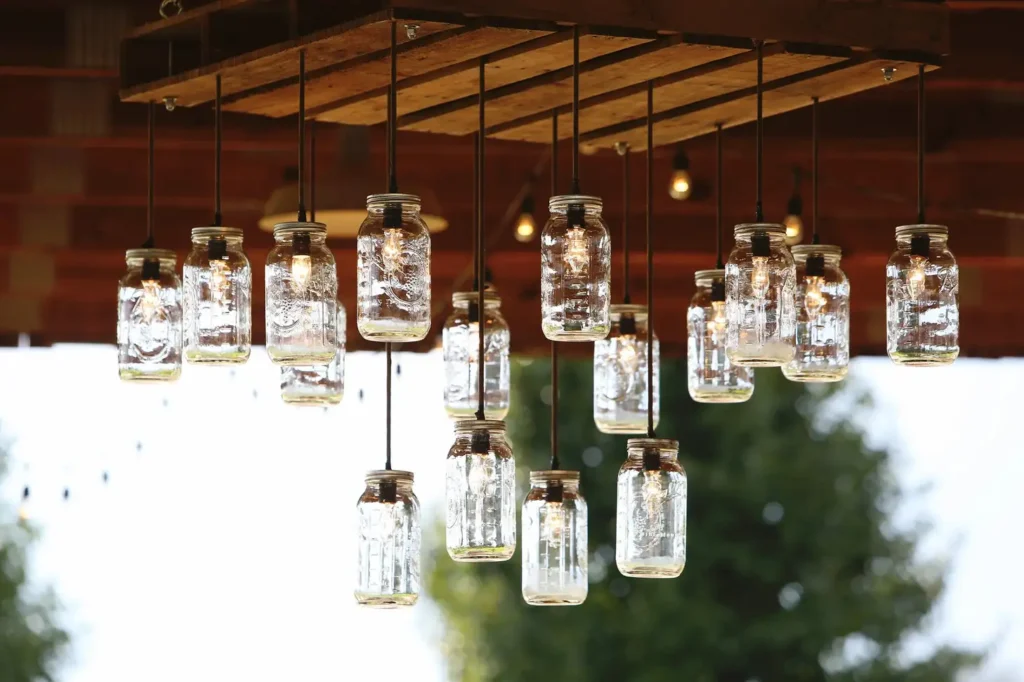
4. Mason Jar Hanging Light Fixture
Overview: Create a charming and rustic hanging light fixture using mason jars, adding a touch of farmhouse flair to any room.
Materials Needed:
- Mason jars (or other glass jars)
- Pendant light kit or lamp cord set
- Pliers or wire cutters
- Screws or hooks for hanging
Estimated Cost: $20-$40, depending on the number of jars and the light kit chosen.
Instructions:
- Gather your mason jars and clean them thoroughly.
- Follow the instructions included with your pendant light kit or lamp cord set to assemble the light fixture.
- Using pliers or wire cutters, carefully remove the lid rings from the mason jars, leaving just the lids.
- Screw the light fixture components into the lids, ensuring they’re secure and properly wired.
- Screw the lids back onto the mason jars, creating your hanging light fixtures.
- Install appropriate screws or hooks in your ceiling to hang the light fixtures.
- Hang the mason jar lights and admire your handiwork!
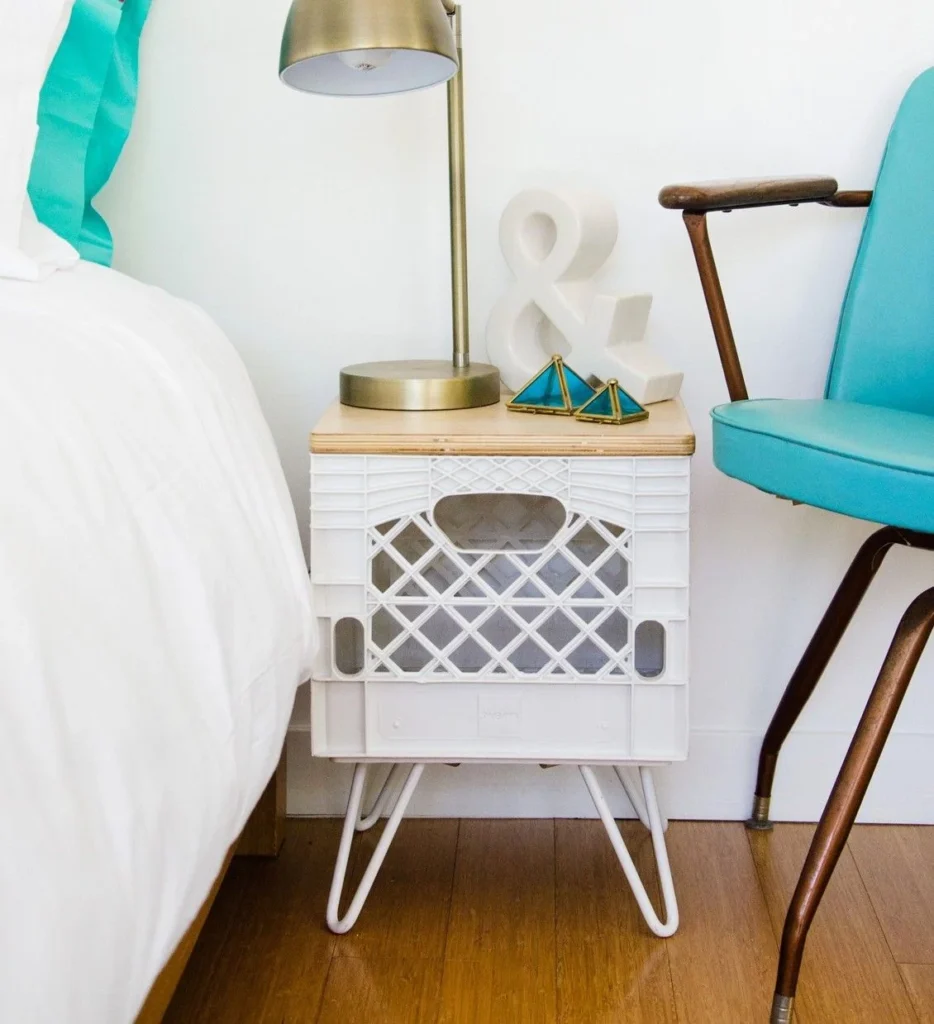
5. Milk Crate End Tables
Overview: Transform ordinary milk crates into stylish and functional end tables that perfectly complement your farmhouse decor.
Materials Needed:
- Milk crates (plastic or wire)
- Wood stain or paint (optional)
- Sandpaper (if using wood crates)
- Felt pads or furniture sliders (optional)
Estimated Cost: $10-$20, depending on the source of the milk crates and any additional supplies needed.
Instructions:
- Start by gathering your milk crates – plastic or wire both work well for this project.
- If using wooden milk crates, sand them down to prepare for finishing.
- (Optional) Apply a coat of wood stain or paint to the crates to achieve your desired color or distressed look.
- (Optional) Attach felt pads or furniture sliders to the bottom of the crates to protect your floors.
- Arrange the crates in a sturdy configuration to create your end tables.
- Style your new end tables with lamps, books, or other farmhouse-inspired decor items.
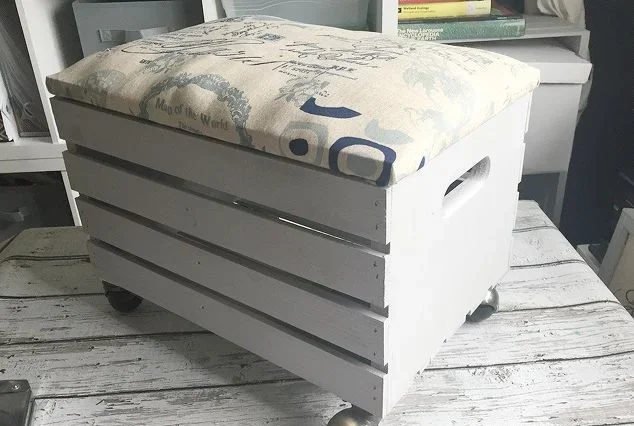
6. Wooden Crate Storage Ottomans
Overview: Re purpose old wooden crates into stylish and functional storage ottomans that not only add farmhouse charm to your space but also provide extra storage for blankets, magazines, or other items.
Materials Needed:
- Wooden crates (various sizes)
- Cushion or upholstery foam
- Fabric for upholstery
- Sandpaper
- Wood stain or paint (optional)
- Polyurethane or clear sealer (optional)
- Hinges (if desired)
Estimated Cost: $30-$60, depending on the size and number of crates, as well as the upholstery materials used.
Instructions:
- Gather your wooden crates and sand them down to prepare for finishing.
- (Optional) Apply a coat of wood stain or paint to the crates to achieve your desired color or distressed look.
- (Optional) Apply a clear polyurethane or sealer to protect the finished surface.
- Cut cushion or upholstery foam to fit the inside of the crates, creating a comfortable seating surface.
- Upholster the foam with your chosen fabric, securing it in place with a staple gun or adhesive.
- (Optional) Install hinges on one side of the crate to create a lifting lid for easy access to the storage compartment.
- Arrange your new storage ottomans in your living space or bedroom, and enjoy the added storage and seating!
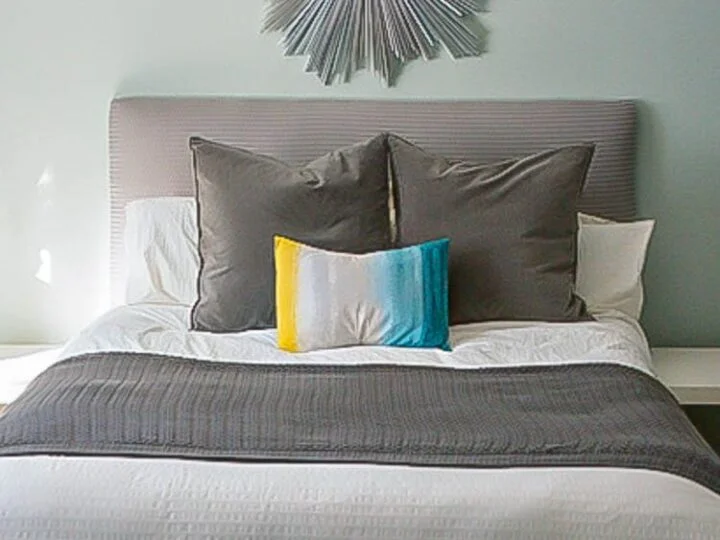
7. Fabric-Covered Headboard
Overview: Add a touch of farmhouse charm to your bedroom by creating a cozy, fabric-covered headboard that not only looks inviting but also provides a comfortable backrest.
Materials Needed:
- A large piece of plywood or particleboard (cut to desired headboard size)
- Batting or upholstery foam
- Fabric of your choice (enough to cover the headboard and wrap around the edges)
- Staple gun and staples
- Scissors or rotary cutter
- Sandpaper (optional)
- Wood stain or paint (optional)
Estimated Cost: $40-$80, depending on the size of the headboard and the materials used.
Instructions:
- Start by cutting your plywood or particleboard to the desired size for your headboard.
- (Optional) Sand the surface of the board and apply a coat of wood stain or paint if desired.
- Cut the batting or upholstery foam to fit the size of the headboard, and adhere it to the front surface using a spray adhesive or staples.
- Cut your fabric to size, ensuring you have enough to wrap around the edges of the headboard.
- Place the fabric face down on a flat surface and position the headboard board on top, centered.
- Pull the fabric taut and staple it to the back of the headboard, working your way around and folding the corners neatly.
- Once fully upholstered, attach the headboard to your bed frame using appropriate hardware or mounting methods.
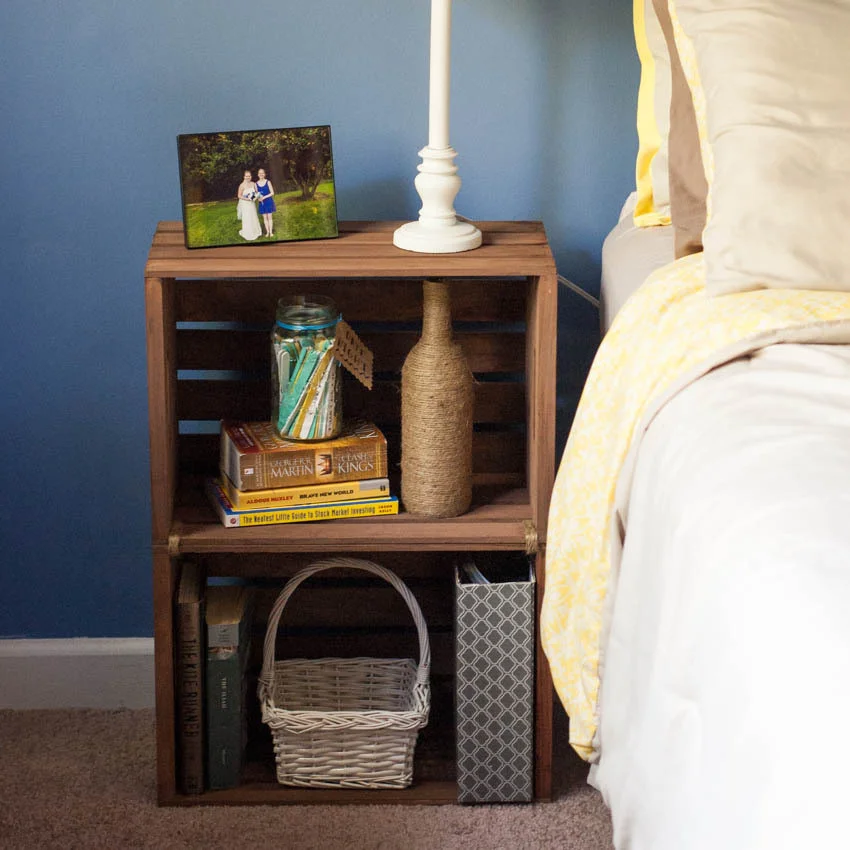
8. Distressed Side Table from Wooden Crates
Overview: Create a charming and rustic side table with a distressed finish by re purposing old wooden crates, perfect for adding farmhouse flair to any room.
Materials Needed:
- Wooden crates (2-3, depending on desired height)
- Sandpaper
- Wood stain or paint (optional)
- Polyurethane or clear sealer (optional)
- Wood glue or screws
- Felt pads or furniture sliders (optional)
Estimated Cost: $20-$40, depending on the source of the crates and any additional supplies needed.
Instructions:
- Gather your wooden crates and sand them down to prepare for finishing.
- (Optional) Apply a coat of wood stain or paint to the crates to achieve your desired color or distressed look.
- Stack and arrange the crates in your desired configuration for the side table, ensuring they’re level and sturdy.
- Secure the crates together using wood glue or screws for added stability.
- (Optional) Apply a clear polyurethane or sealer to protect the finished surface.
- (Optional) Attach felt pads or furniture sliders to the bottom of the crates to protect your floors.
- Style your new side table with a lamp, books, or other farmhouse-inspired decor items.
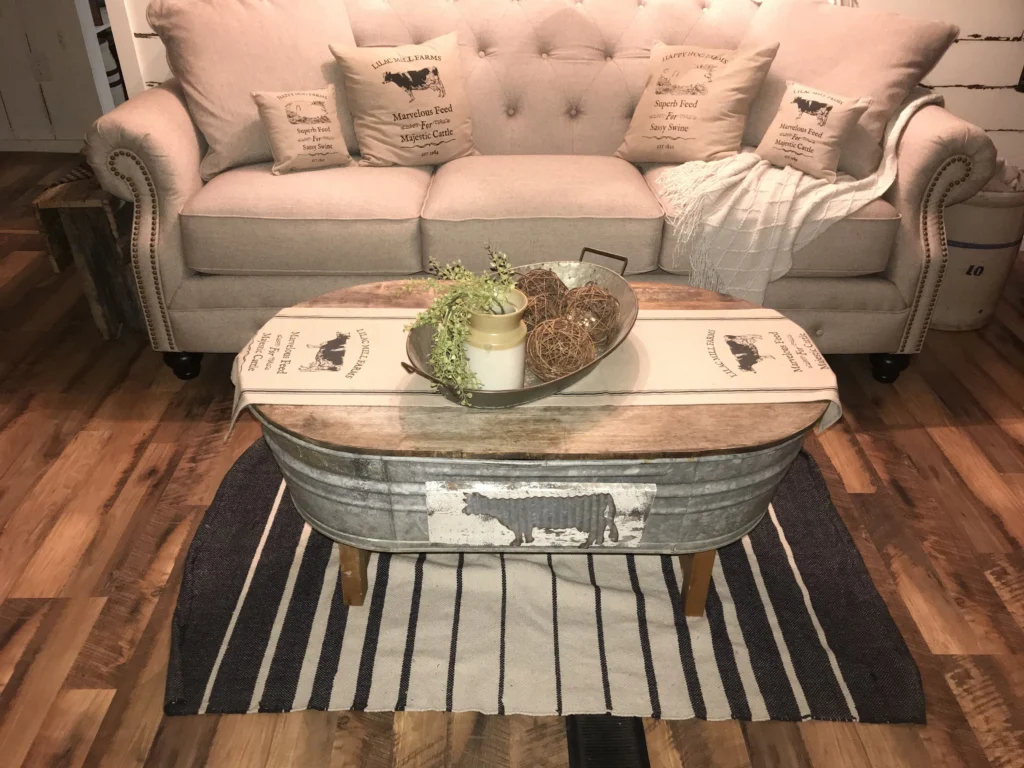
9. Galvanized Metal Tub Coffee Table
Overview: Transform an old galvanized metal tub into a unique and eye-catching coffee table that perfectly captures the rustic charm of farmhouse style.
Materials Needed:
- A large galvanized metal tub or similar container
- Wood boards or a circular piece of plywood (for the tabletop)
- Sandpaper
- Wood stain or paint (optional)
- Polyurethane or clear sealer (optional)
- Wood glue or screws
- Felt pads or furniture sliders (optional)
Estimated Cost: $30-$60, depending on the source of the metal tub and the materials used for the tabletop.
Instructions:
- Start by thoroughly cleaning and preparing your galvanized metal tub.
- Cut your wood boards or plywood to fit the top of the tub, creating the tabletop surface.
- Sand the wood tabletop and apply a wood stain or paint if desired.
- (Optional) Apply a clear polyurethane or sealer to protect the finished surface.
- Secure the wood tabletop to the metal tub using wood glue or screws, ensuring it’s level and sturdy.
- (Optional) Attach felt pads or furniture sliders to the bottom of the tub to protect your floors.
- Style your new coffee table with books, candles, or other farmhouse-inspired decor items.
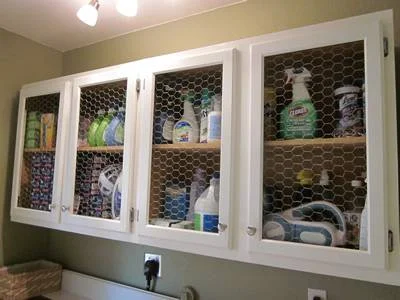
10. Chicken Wire Cabinet Doors
Overview: Add a touch of farmhouse charm to your kitchen or bathroom by replacing cabinet doors with chicken wire panels, creating a unique and rustic look.
Materials Needed:
- Chicken wire or hardware cloth
- Wood boards or frames (for the cabinet door frames)
- Sandpaper
- Wood stain or paint (optional)
- Polyurethane or clear sealer (optional)
- Hinges or cabinet door hardware
- Staple gun and staples (or wire cutters and pliers)
Estimated Cost: $30-$60, depending on the size of the cabinet doors and the materials used.
Instructions:
- Measure the size of your cabinet doors and cut the wood boards or frames to fit accordingly.
- Sand the wood frames and apply a wood stain or paint if desired.
- (Optional) Apply a clear polyurethane or sealer to protect the finished surface.
- Cut the chicken wire or hardware cloth to fit the size of the cabinet door frames, allowing for a few inches of overlap on each side.
- Secure the chicken wire to the back of the frames using a staple gun or by wrapping the excess wire around the frame and twisting it tightly with pliers.
- Attach the hinges or cabinet door hardware to the frames.
- Install the new chicken wire cabinet doors, and enjoy the rustic farmhouse charm they add to your space!
Tips for Achieving the Perfect Farmhouse Look
While the DIY projects themselves are a significant part of creating a farmhouse-inspired space, there are a few additional tips and techniques that can help you truly nail that coveted aesthetic:
- Distressing and Antiquing Techniques: Embrace the worn, lived-in look by distressing and antiquing your furniture pieces. Techniques like sanding, dry-brushing, and applying antiquing glazes can add depth and character to your DIY creations.
- Incorporate Vintage/Repurposed Elements: Farmhouse style is all about mixing old and new. Incorporate vintage or repurposed elements like old windows, shutters, or even antique tools into your decor for added character and charm.
- Color Palettes: When it comes to farmhouse color schemes, think neutral tones like whites, creams, grays, and soft blues or greens. These hues create a warm, inviting atmosphere and allow your DIY furniture pieces to take center stage.
- Accessory and Decor Ideas: Complete the farmhouse look by incorporating accessories like galvanized metal accents, mason jars, vintage signs, and cozy textiles like
Where to Find Inexpensive Materials
One of the keys to creating cheap and easy DIY farmhouse furniture is sourcing inexpensive materials. Fortunately, there are plenty of places to find budget-friendly supplies for your projects:
- Thrift Stores and Flea Markets: These are goldmines for finding unique and affordable items like old doors, windows, furniture pieces, and even galvanized metal tubs or crates that can be repurposed into stunning farmhouse decor.
- Home Improvement/Hardware Store Scraps: Don’t overlook the scrap wood and material sections at your local home improvement or hardware stores. You can often find discounted boards, pallets, and other materials that are perfect for DIY projects.
- Online Marketplaces and Apps: Websites like Craigslist, Facebook Marketplace, and neighborhood apps like Nextdoor are great places to find people giving away or selling used furniture, doors, windows, and other items that can be upcycled into farmhouse pieces.
- Ask Around: Don’t be afraid to ask friends, family, or neighbors if they have any old furniture, doors, or other materials they’re looking to get rid of. You might be surprised at what people have lying around that they’re willing to give away or sell for cheap.
Tools and Supplies Needed for DIY Furniture
While many of these DIY farmhouse furniture projects can be completed with basic tools and supplies, it’s helpful to have a few essentials on hand:
- Basic Toolkit: A hammer, screwdrivers, pliers, a saw (hand or power), sandpaper, and a measuring tape are must-haves for most DIY projects.
- Common Budget-Friendly Materials: Wood boards or pallets, fabrics, mason jars, galvanized metal tubs or buckets, and chicken wire are all inexpensive materials that can be transformed into farmhouse-inspired pieces.
- Paints, Stains, and Finishes: A collection of paint colors (especially whites, blues, and greens), wood stains, antiquing glazes, and clear sealers or polyurethanes will help you achieve those perfect farmhouse finishes.
Having these tools and materials on hand will not only make your DIY projects easier but also ensure that you can create high-quality, long-lasting farmhouse furniture pieces on a budget.
Conclusion
Embracing the farmhouse aesthetic doesn’t have to mean breaking the bank. With a little creativity, some elbow grease, and a few inexpensive materials, you can transform everyday items into stunning, one-of-a-kind furniture pieces that will infuse your home with warmth, character, and rustic charm.
From re-purposing old doors and pallets to creating unique light fixtures and storage ottomans, the possibilities for DIY farmhouse furniture are truly endless. Not only will you save money, but you’ll also enjoy the immense satisfaction of having crafted these pieces yourself, adding a personal touch to your living space.
So, what are you waiting for? Gather your supplies, roll up your sleeves, and let your inner DIY goddess or god shine! With these 10 cheap and easy DIY farmhouse furniture ideas, you’re well on your way to creating a cozy, inviting haven that perfectly reflects your rustic, farmhouse-inspired style.
People Also Ask
How can I distress furniture for a farmhouse look?
There are several techniques you can use to distress furniture and achieve that perfect farmhouse look:
- Sanding: Lightly sand the edges, corners, and raised areas of the furniture piece to create a worn, aged appearance.
- Dry Brushing: Apply a dry brush technique by lightly brushing on a contrasting paint color over the base coat, allowing the underlying color to show through in areas where the brushstrokes are lighter.
- Antiquing Glaze: Apply an antiquing glaze over the painted or stained surface, and then wipe away the excess, leaving the glaze settled into the crevices and detailing for an aged, distressed look.
- Wax or Crackle Medium: Use a clear wax or crackle medium over the paint or stain to create a crackled, chippy effect that adds character and depth.
- Physical Distressing: Carefully hit or scrape the furniture with chains, hammers, or other tools to create dents, scratches, and imperfections that mimic natural wear and tear.
Remember, the key is to embrace imperfections and create a lived-in, rustic appearance that adds charm and personality to your DIY farmhouse furniture pieces.
What are some good farmhouse color schemes?
When it comes to farmhouse color schemes, the goal is to create a warm, inviting, and rustic atmosphere. Some popular farmhouse color palettes include:
- Neutral Tones: Whites, creams, grays, and tans create a cozy and calming base, allowing pops of color from accessories and decor to shine.
- Soft Blues and Greens: Muted shades of blue and green, like dusty blues and sage greens, add a touch of serenity and bring in elements of nature.
- Warm Earth Tones: Earthy hues like terracotta, mustard yellow, and deep reds or browns evoke a rustic, cozy feeling and pair beautifully with wood accents.
- Black Accents: While farmhouse style is often light and airy, incorporating black accents through furniture pieces, hardware, or decor can add depth and contrast.
Remember, the key is to mix and layer these colors, incorporating various shades and textures to create a cohesive, lived-in aesthetic that feels warm and welcoming.
Where do I find affordable farmhouse decor?
In addition to creating your own DIY farmhouse furniture, there are plenty of places to find affordable farmhouse decor to complete the look:
- Thrift Stores and Flea Markets: These are treasure troves for unique, vintage, and budget-friendly farmhouse accents like mason jars, galvanized metal pieces, old signs, and more.
- Online Marketplaces: Sites like Etsy, Wayfair, and even Amazon offer a wide variety of affordable farmhouse-inspired decor, from wall art to textiles and accessories.
- Craft Stores: Don’t overlook your local craft stores for inexpensive materials like burlap, twine, and other natural elements that can be incorporated into DIY farmhouse decor projects.
- Garage Sales and Estate Sales: Keep an eye out for local garage and estate sales, where you can often find unique, one-of-a-kind pieces with farmhouse charm at bargain prices.
- DIY Projects: Many farmhouse decor items, like mason jar vases, wooden signs, and even wreath
